

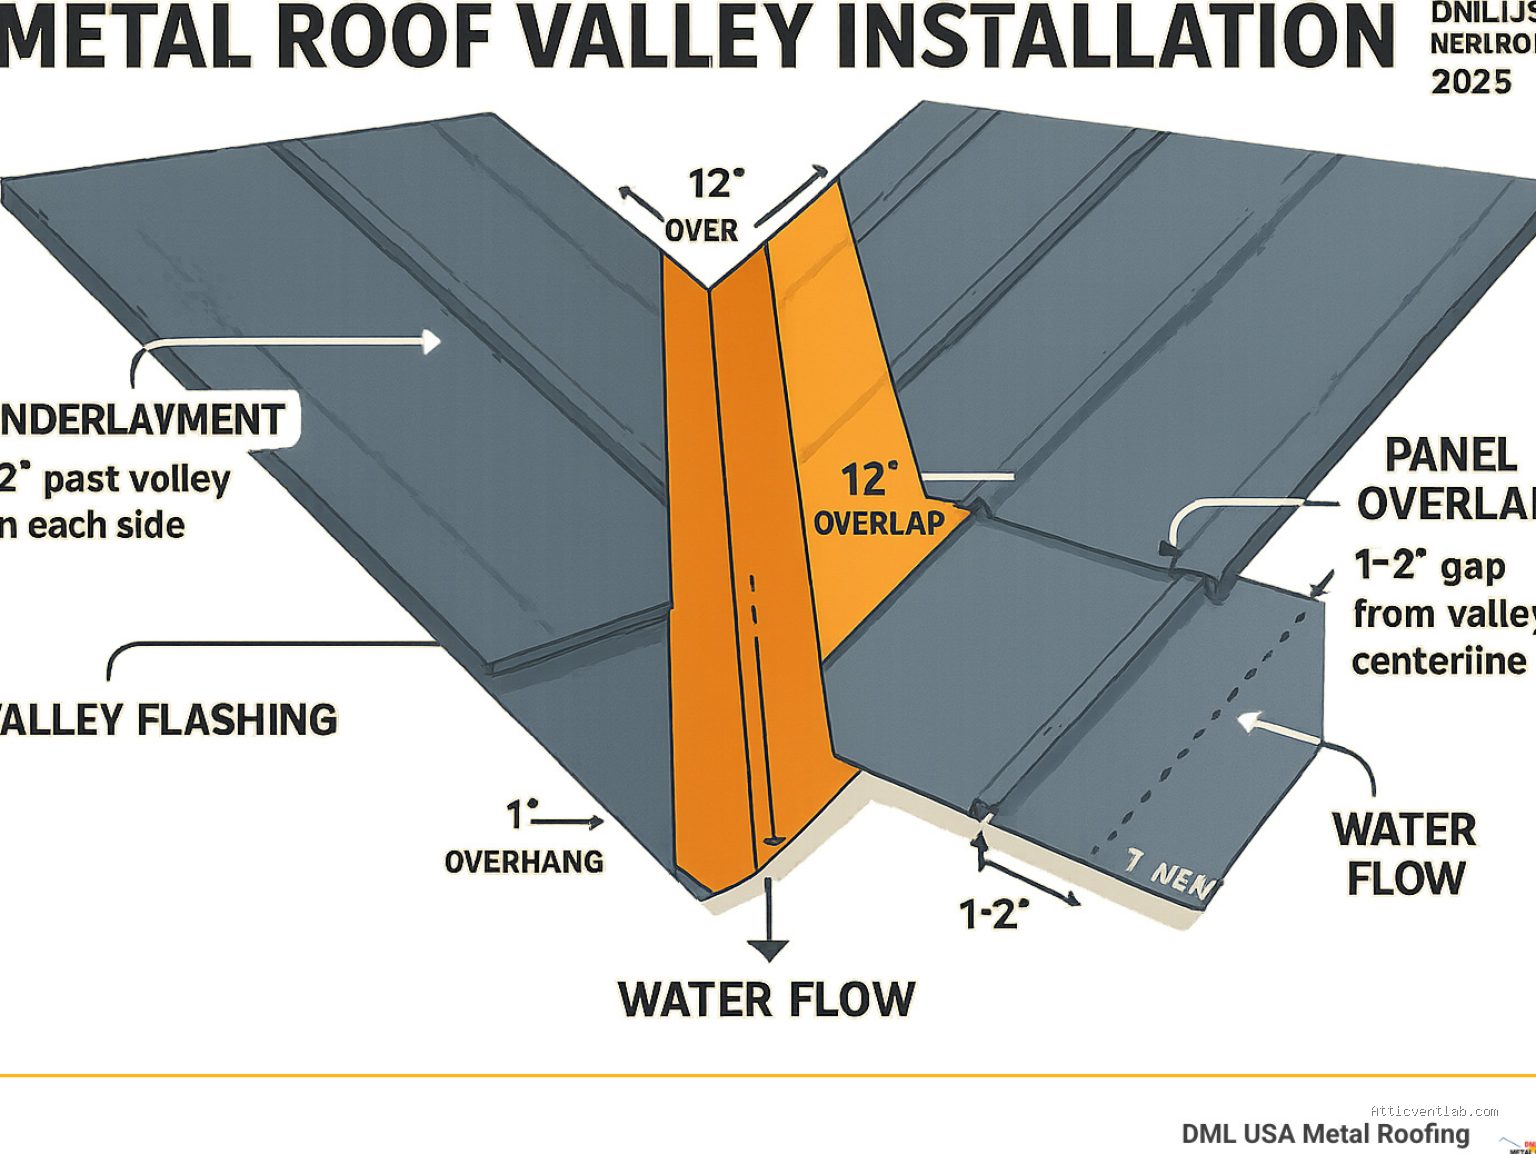
Atticventlab.com – Installing a low-pitch valley membrane under an open metal roll valley requires a continuous, high-performance waterproof underlayment layer that extends at least 24 inches up both roof planes to prevent water backup and ice dam infiltration. This specialized installation ensures that the metal valley flashing acts as a secondary drainage channel while the membrane provides the primary line of defense against wind-driven rain and snowmelt.
Understanding the Risks of Low-Pitch Valleys
Low-pitch roofs, typically those below 4:12, are highly susceptible to water backup. When an open metal valley is used, water travels at a higher velocity, and the potential for debris accumulation is significantly increased. If the membrane is not installed correctly, water can easily seep beneath the metal flashing, leading to structural rot, mold growth, and interior water damage. The primary goal is to create a seamless, watertight envelope that allows the metal to expand and contract without compromising the seal.
Essential Materials and Preparation
Before beginning the installation, ensure you have a self-adhering, high-temperature modified bitumen membrane. Standard roofing felt is insufficient for low-pitch valleys as it lacks the necessary adhesion and waterproofing properties to handle standing water. The metal valley flashing should be pre-bent to the specific angle of the valley to ensure it sits flush against the deck. Always inspect the roof deck for any protrusions, loose nails, or uneven surfaces, as these will puncture the membrane over time.
Step-by-Step Installation Process
- Clear the entire valley area of all debris, dust, and moisture to ensure maximum adhesion for the membrane.
- Install a starter strip of the self-adhering membrane along the centerline of the valley, ensuring it is perfectly centered and smoothed out from the middle toward the edges to prevent air pockets.
- Apply a full-width sheet of the membrane over the starter strip, extending it at least 24 inches up each roof plane.
- Use a heavy steel hand roller to press the membrane firmly into the roof deck, paying close attention to the edges to ensure a watertight bond.
- Install the metal valley flashing over the membrane, securing it with clips rather than nails whenever possible to minimize penetrations.
- If nailing is required for the metal, place nails at the extreme edges of the metal flange, ensuring they are covered by the subsequent course of shingles.
Comparison of Valley Underlayment Options
| Material Type | Suitability for Low-Pitch | Key Advantage |
|---|---|---|
| Standard 30lb Felt | Not Recommended | Inexpensive but prone to tearing |
| Synthetic Underlayment | Moderate | High tear strength, but not self-sealing |
| High-Temp Self-Adhering Membrane | Best Choice | Self-seals around fasteners, waterproof |
Common Mistakes to Avoid
One of the most frequent errors is “bridge-installing” the membrane, where the material is pulled tight across the valley without being pressed into the corner. This creates a void beneath the membrane, which can collapse under the weight of snow or heavy rain, leading to cracking. Always ensure the membrane conforms perfectly to the shape of the valley floor before installing the metal flashing.
Another common mistake is placing fasteners through the center of the metal valley. Any nail placed in the center of the valley acts as a direct conduit for water into the roof deck. Always use concealed clips for metal valleys. If you must use nails, keep them at least 6 to 8 inches away from the center line of the valley to keep the water channel clear.
Managing Thermal Expansion
Metal valley rolls expand and contract significantly with temperature changes. If the metal is nailed too tightly, it will buckle or tear the membrane underneath. Utilizing a clip system allows the metal to “float” slightly, accommodating thermal movement while maintaining its position. Ensure that the metal flashing is not restricted by excessive sealant or over-driven nails, as this often leads to premature failure of the waterproofing layer.
Signs of Improper Installation
Read also: Signs of Water Siphoning Between Overlapping Metal Valley Flashing Sheets
You should inspect your valley installation if you notice water stains appearing on rafters or ceiling drywall directly beneath the valley area. Other warning signs include localized shingle deterioration at the base of the valley or visible rust on the metal flashing, which indicates that water is sitting in the channel longer than it should. If the metal appears wavy or lifted, it is a sign that the thermal expansion was not managed correctly during the installation phase.
Frequently Asked Questions
Q: Can I use asphalt shingles directly over the metal valley?
A: No, you should always maintain an open metal channel. If you cover the metal with shingles, you create a “closed valley” which is prone to clogging and water backup, especially on low-pitch roofs.
Q: How far up the roof should the membrane extend?
A: For low-pitch applications, a minimum of 24 inches on each side of the valley center is the industry standard. This provides enough coverage to handle the increased water volume and potential for wind-driven rain.
Q: Is it necessary to use ice and water shield in the valley?
A: Yes, high-temperature ice and water shield is the preferred material. It provides an essential waterproof seal that protects the deck even if the metal flashing is compromised or if water backs up due to debris.
Final Maintenance Tips
Routine maintenance is vital for the longevity of your valley system. Every spring and autumn, clear the valley of leaves, pine needles, and other debris. Accumulated organic material holds moisture against the metal and membrane, accelerating the degradation of the sealant. By keeping the valley clear, you ensure that water flows freely to the gutters, keeping your roof deck dry and your home protected from the elements.
📷 Photo by dmlusa.com








1 Comments
[…] Read AlsoHow to Install a Low-Pitch Valley Membrane Under Open Metal Roll Valleys […]