

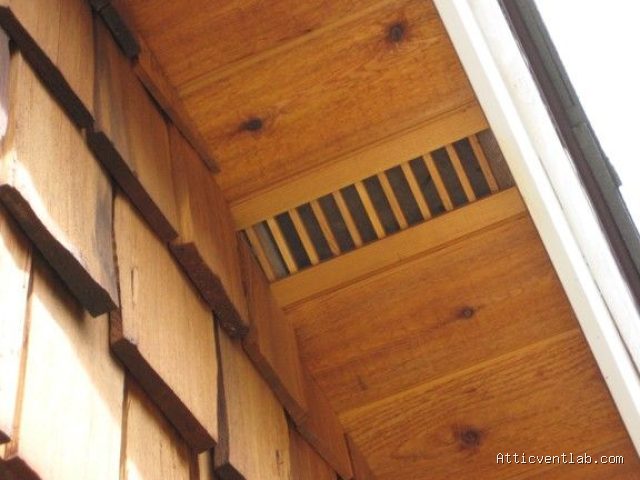
Atticventlab.com – Retrofitting rectangular soffit vents into solid wood eave overhangs involves precision cutting to ensure structural integrity while providing critical intake airflow to prevent moisture buildup and ice damming. You must align the cuts between existing rafters and install a dedicated ventilation screen to keep pests out without compromising the eave’s load-bearing capacity.
Understanding the Importance of Eave Ventilation
Solid wood overhangs, often found in historic homes or custom-built structures, frequently lack the perforated soffit panels common in modern construction. Without adequate intake airflow, your attic becomes a stagnant chamber. During the summer, trapped heat raises cooling costs and damages roof shingles. In the winter, the lack of cold air circulation allows warm attic air to melt snow on the roof surface, which then refreezes at the eaves, creating destructive ice dams.
Retrofitting vents into solid timber requires a cautious approach. Unlike aluminum or vinyl soffits, solid wood is structural. You cannot simply hack away at the wood without considering the structural load of the roof edge. The goal is to provide enough Net Free Area (NFA) to match your ridge vent capacity while maintaining the aesthetic integrity of your home’s exterior.
Tools and Materials Required for the Installation
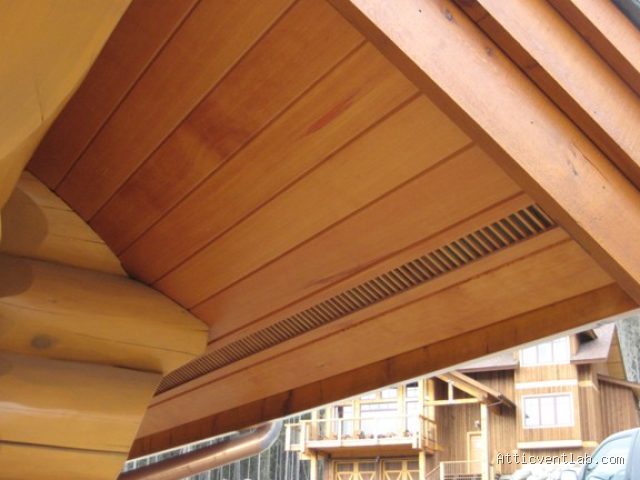
📷 Photo by soffitvents.ca
Before starting, ensure you have the correct ventilation products. High-quality rectangular soffit vents, typically made of aluminum or heavy-duty resin, are preferred for their durability. You will also need a jigsaw, a drill with a large spade bit or hole saw, a chalk line, and a quality exterior-grade sealant.
| Tool/Material | Purpose |
|---|---|
| Jigsaw | Cutting the rectangular opening in solid wood |
| Chalk Line | Marking precise layout lines for symmetry |
| Exterior Sealant | Preventing moisture ingress at the vent flange |
| Corrosion-Resistant Screws | Securing the vent to the wood substrate |
| Mesh Screen | Blocking insects and rodents from the attic |
Step-by-Step Installation Process
- Locate the rafters: Use a stud finder or probe the eave to identify the exact position of the rafters. You must avoid cutting through structural members. Mark these locations clearly on the underside of the eave.
- Measure and mark: Determine the center point between two rafters. Place your rectangular vent template on the eave and trace the perimeter. Ensure the edges of the cut will not interfere with the rafter tails.
- Drill pilot holes: Drill a hole inside each corner of your traced rectangle. This allows the jigsaw blade to enter the wood without damaging the finish of the surrounding eave.
- Cut the opening: Use a fine-tooth jigsaw blade to cut along your traced lines. Maintain a steady hand to ensure the edges are straight, as these will be visible from the ground.
- Inspect the cavity: Reach into the hole to ensure there is no insulation blocking the airflow path. If insulation is covering the intake, install a baffle to keep the air channel clear.
- Install the vent: Apply a bead of exterior-grade sealant to the back flange of the vent. Insert the vent into the hole and secure it using corrosion-resistant screws.
Common Mistakes to Avoid
One of the most frequent errors is failing to provide a clear air path into the attic. Even if you install a vent, it is useless if the insulation in the attic is pushed all the way to the edge of the roof deck. Always check that air can move freely from the vent into the attic space. Without a baffle, wind-blown rain or snow can also saturate your insulation, leading to mold growth.
Another mistake is poor spacing. Installing too few vents will result in inadequate NFA, which defeats the purpose of the project. Consult your local building codes for the required NFA based on your attic square footage. Generally, you should aim for a 1:150 ratio of vent area to attic floor area, split between intake and exhaust.
Structural Considerations and Maintenance
When working with solid wood, the edges of your cut are susceptible to rot. Always prime and paint the raw wood edges exposed by your jigsaw cuts before installing the vent. This simple step prevents moisture from wicking into the timber and causing structural decay over time.
Periodically inspect the vents for debris. Leaves, spider webs, and bird nests can quickly clog the mesh, reducing the airflow significantly. A quick visual inspection twice a year—once in the spring and once in the fall—is usually sufficient to keep the system functioning efficiently.
Frequently Asked Questions
Q: Can I install these vents if my roof has a steep pitch?
A: Yes, but ensure the vents are positioned correctly on the horizontal plane of the soffit. If the eave is too narrow due to the pitch, you may need to use smaller, circular vents rather than large rectangular ones.
Q: Will cutting these holes weaken my roof edge?
A: Not if you stay between the rafters. By keeping your cuts centered in the bays, you are not touching the structural supports. Never cut through a rafter or a fascia board without consulting a structural engineer.
Q: Do I really need to use sealant?
A: Absolutely. Sealant acts as a gasket, preventing water from dripping behind the vent flange and rotting the wood soffit from the inside out. It also helps reduce vibration and rattling during high winds.
Final Thoughts on Attic Health
Retrofitting soffit vents is a high-impact home improvement project that pays dividends in energy efficiency and building longevity. By managing the temperature and moisture levels in your attic, you protect your roof decking, shingles, and insulation from premature failure. While it requires careful measurement and steady tool work, the process is manageable for a skilled homeowner and significantly improves the overall performance of your home’s ventilation system.
Read also: Causes of Water Bleeding Around Ridge Vent End Caps During High Winds
📷 Photo by pinterest.com








1 Comments
[…] Read also: How to Retrofit Rectangular Soffit Vents into Solid Wood Eave Overhangs […]