
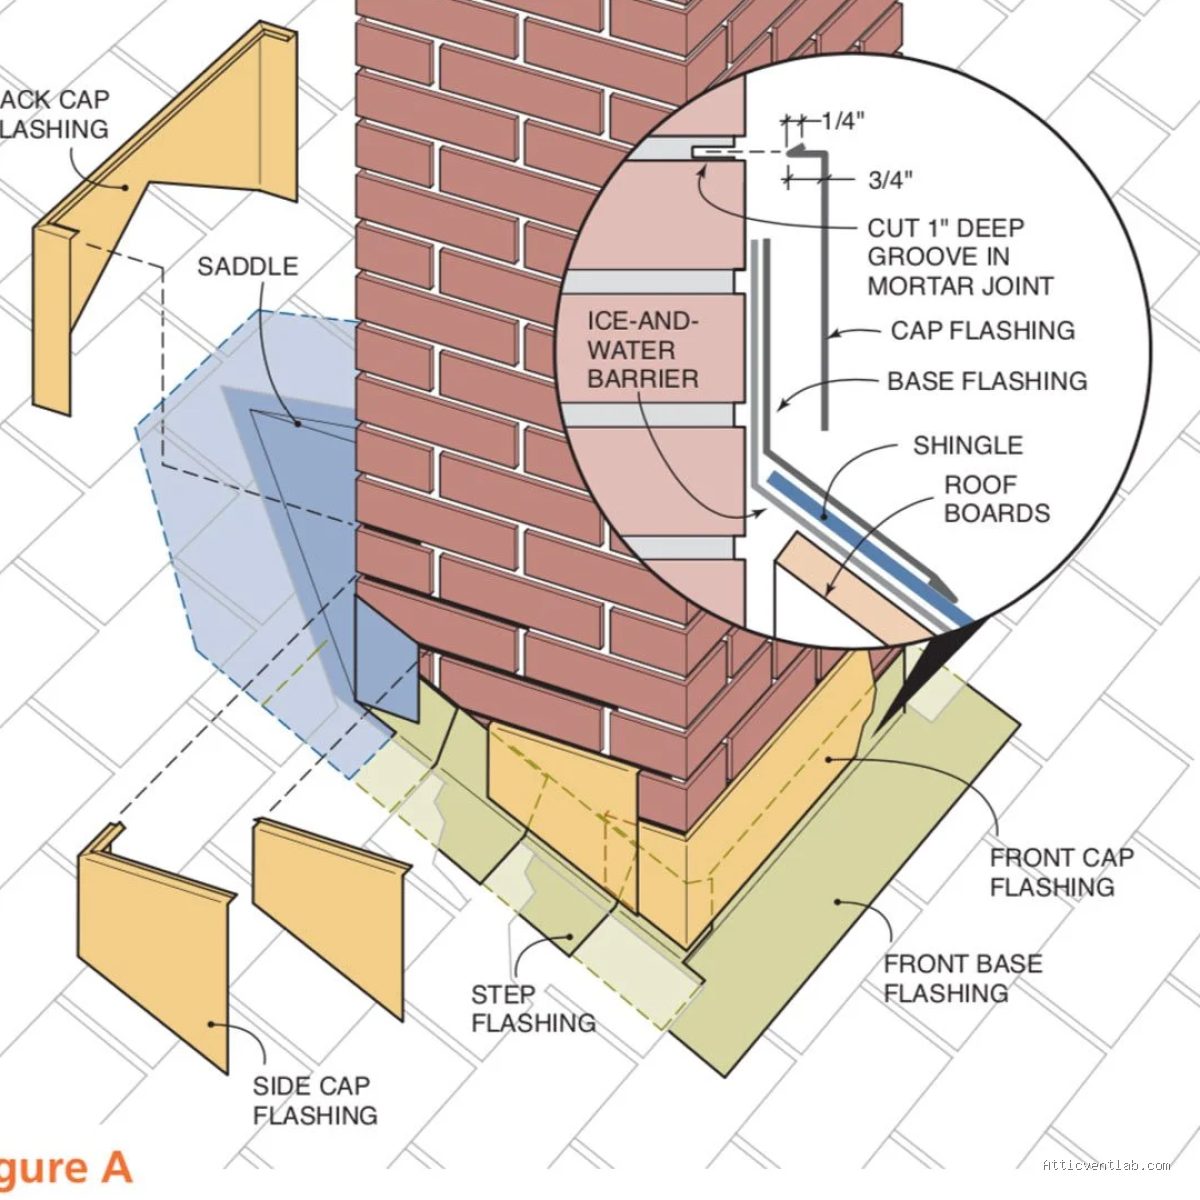
Atticventlab.com – Installing counter flashing on a brick chimney without removing mortar is best achieved by using surface-mounted flashing systems sealed with high-grade polyurethane sealant and mechanical anchors. This method relies on creating a watertight overlap that directs water away from the chimney-roof junction without compromising the structural integrity of the masonry joints.
The Challenge of Traditional Flashing
Traditionally, roofers would cut a reglet—a groove—into the mortar joint of a chimney to tuck the counter flashing inside. While effective, this process is labor-intensive and carries the risk of cracking old, brittle brickwork or damaging the chimney’s structural stability. For homeowners or contractors looking for a non-invasive approach, surface-mounted counter flashing serves as a modern, reliable alternative that maintains a professional look and superior water protection.
Essential Tools and Materials
Before beginning, ensure you have the correct materials. Using generic hardware store sealants often leads to premature failure. You need a high-performance, UV-resistant polyurethane sealant specifically rated for masonry. You will also need aluminum or copper flashing coils, masonry anchors (often called Tapcons or drive-in anchors), a drill with a masonry bit, and metal snips.
| Material | Purpose | Recommendation |
|---|---|---|
| Counter Flashing | Deflects water | Aluminum or Copper (24-26 gauge) |
| Sealant | Watertight seal | Polyurethane-based (NP1 or similar) |
| Fasteners | Mechanical support | 1/4-inch masonry screws with anchors |
| Cleaning Agent | Surface prep | Wire brush and isopropyl alcohol |
The Importance of Surface Preparation
The success of a surface-mounted installation rests entirely on the bond between the sealant and the brick. Because you are not tucking the metal into the mortar, the sealant acts as the primary moisture barrier at the top edge of the flashing. If the surface is dusty, oily, or crumbly, the sealant will eventually peel away, creating a channel for water to seep behind the flashing and into your attic or chimney cavity.
Step-by-Step Installation Guide
- Clean the brick surface thoroughly using a stiff wire brush to remove loose mortar, moss, or dirt. Wipe the area with a cloth dampened with isopropyl alcohol to ensure a grease-free surface for the sealant.
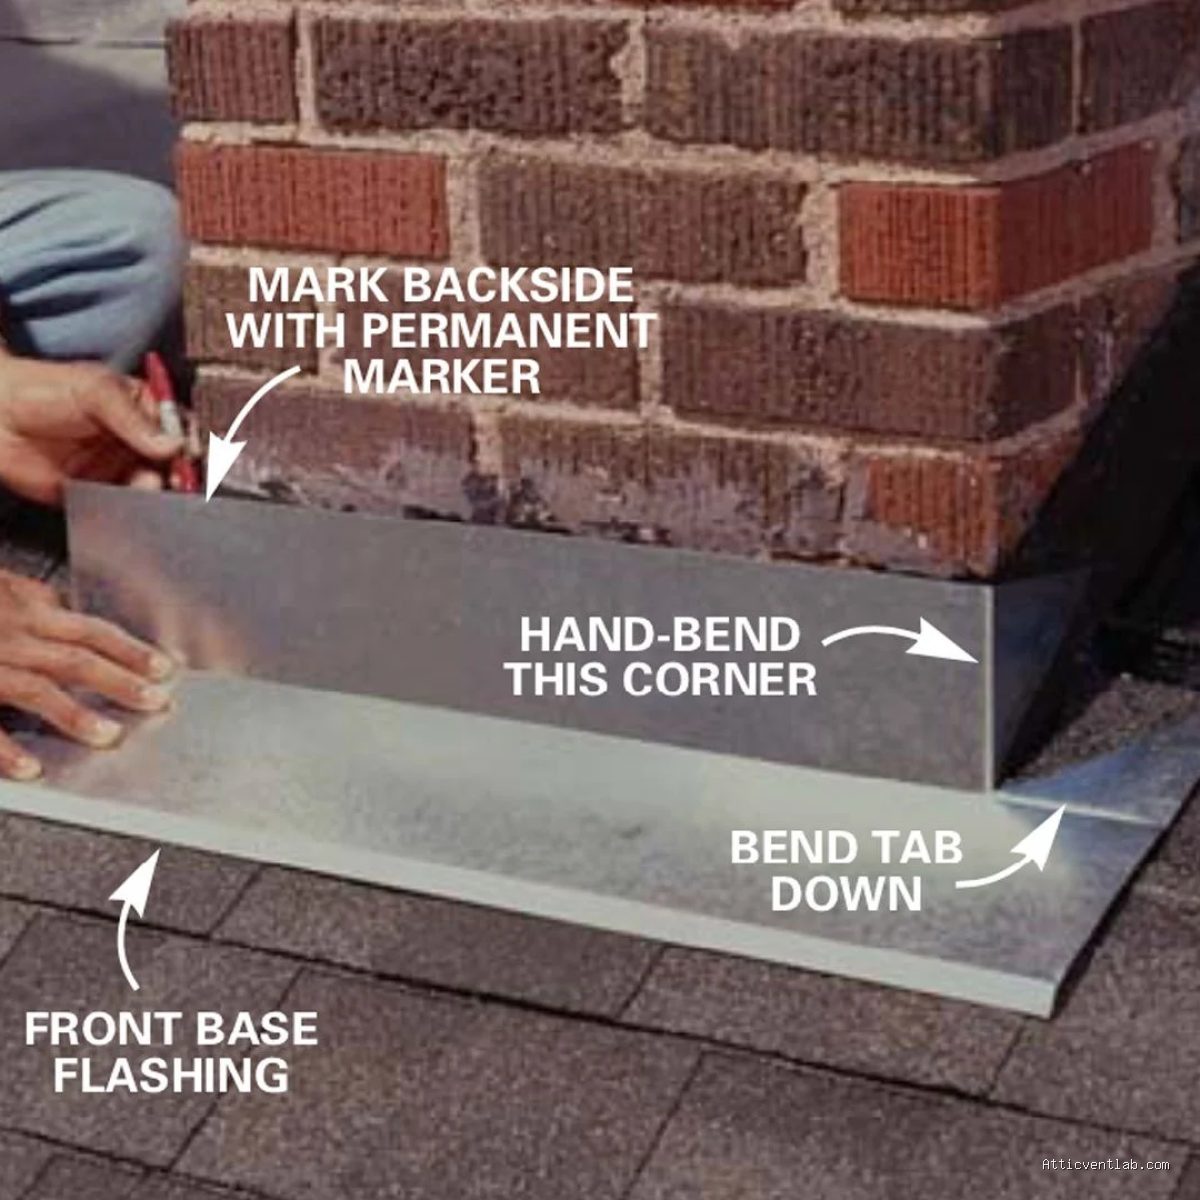
- Measure and cut your counter flashing to length. Ensure the flashing is long enough to overlap the existing base flashing (the metal already against the roof deck) by at least 3 to 4 inches.
- Apply a generous, continuous bead of polyurethane sealant along the top back edge of the flashing strip. This bead should be thick enough to squeeze out slightly when pressed against the brick.
- Press the flashing firmly against the chimney wall. While holding it in place, use a masonry drill bit to create pilot holes through the metal and into the brick. Avoid drilling directly into the mortar joints if possible, as the brick provides a more secure hold for the anchor.
- Insert the masonry anchors and tighten them until the flashing is snug against the chimney wall. The sealant should be visible along the top edge, indicating a complete seal.
- Apply a final “cap bead” of sealant along the top edge of the metal where it meets the brick. Use a caulking tool or your finger to smooth this bead, ensuring there is a slight slope so water runs off the sealant rather than pooling against the chimney.
Common Mistakes to Avoid
A frequent error is over-tightening the anchors. If you torque the screws too aggressively, you can crack the brick or cause the flashing to buckle, which ruins the seal. Another mistake is failing to account for thermal expansion. Metal expands and contracts with temperature changes; if the flashing is installed too tightly without room for movement, the sealant bond will eventually break.
The Risk of Ignoring Chimney Leaks
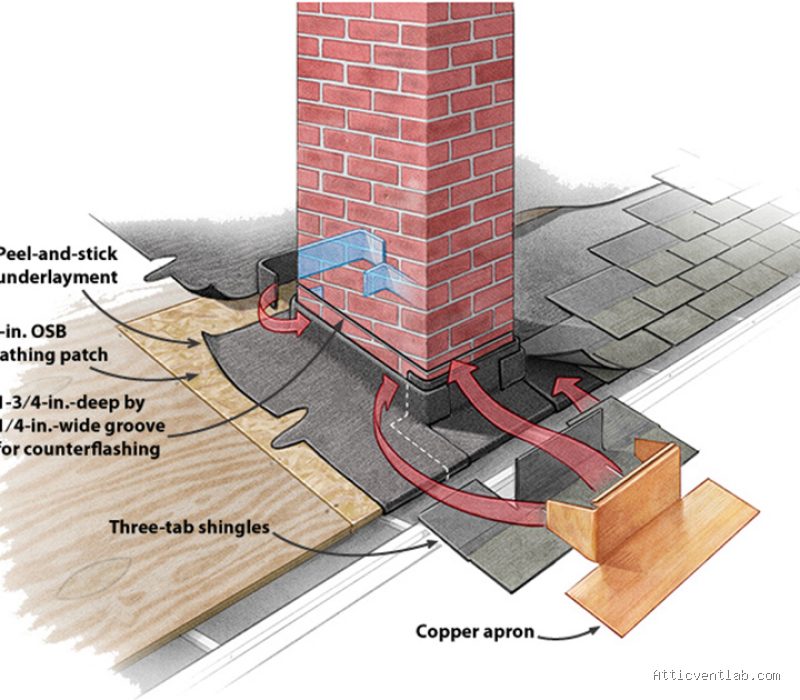
Water infiltration at the chimney base is one of the most common causes of interior ceiling damage. Because the chimney is a vertical structure penetrating a sloped roof, it is a natural collection point for rainwater and melting snow. Even a small gap in your counter flashing can lead to saturated roof decking, wood rot in the attic, and eventual damage to the chimney masonry itself, especially if moisture freezes and expands inside the brick.
Maintenance Tips for Longevity
Even the best installations require periodic inspection. Every two years, perform a visual check of the sealant bead. If you notice cracks, gaps, or signs of the sealant pulling away from the brick, do not wait for a leak to appear. Clean the area, remove the failing sealant, and reapply a fresh bead. This proactive maintenance can extend the life of your chimney flashing system by decades.
Q: Can I use silicone instead of polyurethane sealant?
A: No, silicone is generally not recommended for this application. Polyurethane-based sealants adhere better to masonry, are paintable, and offer superior durability when exposed to the extreme temperature fluctuations typical of a roof environment.
Q: Is it necessary to drill into the brick, or can I just use adhesive?
A: You must use mechanical fasteners. Adhesive alone cannot withstand the physical stress of wind, thermal expansion, and gravity over time. The anchors ensure the flashing remains in place, while the sealant provides the waterproof barrier.
Q: Does this method work on chimneys with irregular stone surfaces?
A: It is significantly more difficult on irregular stone. This method is designed specifically for smooth-faced brick. If your chimney is made of rough fieldstone, you will likely need to use a specialized flexible flashing membrane or consult a professional to ensure a watertight seal.
By following these steps, you create a robust, weather-resistant barrier that protects your home without the destructive nature of traditional masonry work. Precision in cleaning and the quality of your sealant are the two most critical factors in ensuring your chimney remains dry for years to come.
📷 Photo by narodnatribuna.info