

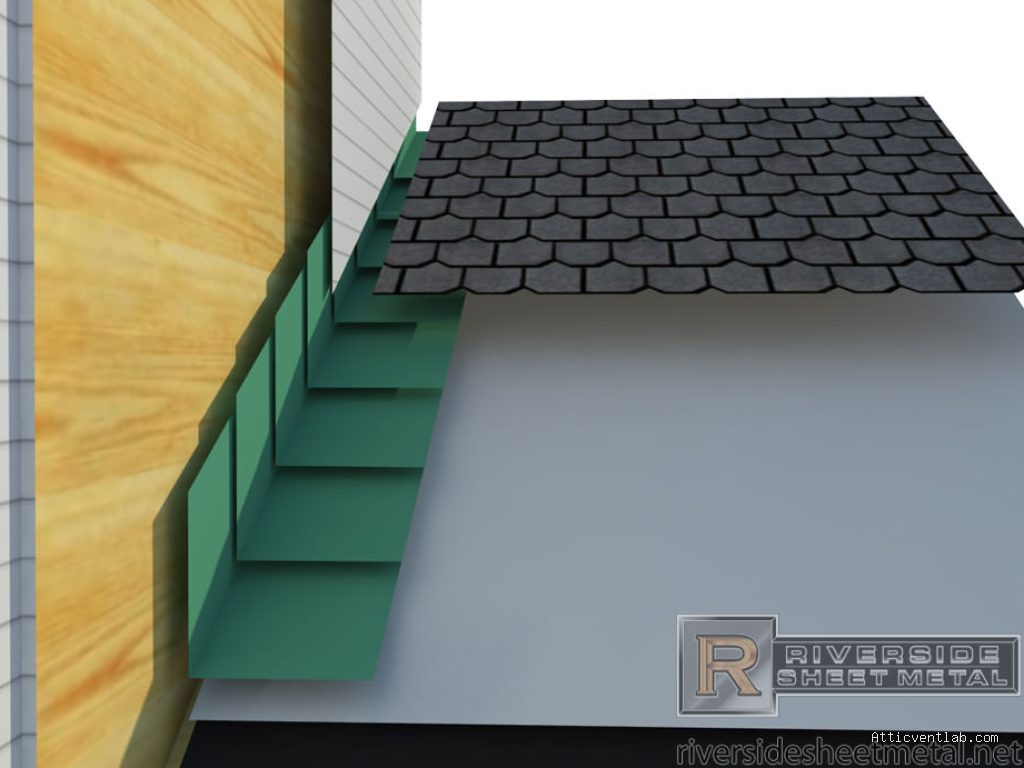
Atticventlab.com – Bending custom step flashing around tight chimney cricket edges requires precise measurement, accurate metal scoring, and a strategic folding sequence to ensure a watertight seal against complex roof geometries. By creating a custom “corner wrap” profile, you prevent water infiltration at the critical intersection where the cricket meets the chimney wall.
Understanding the Challenge of Chimney Crickets
A chimney cricket, or saddle, is a sloped structure built behind a chimney to divert water away from the chimney wall and down the roof slope. Because this area features multiple converging angles—the chimney wall, the cricket slope, and the roof deck—it is a notorious point for leaks. Standard step flashing often fails here because it cannot accommodate the sharp, tight turn where the cricket meets the chimney.
When you attempt to force a standard piece of flashing into these tight corners, you typically end up with gaps or “dog-eared” metal that compromises the integrity of the roofing system. Professional roofers solve this by fabricating custom pieces that wrap around the corner, creating a seamless transition that forces water to flow over the flashing rather than behind it.
Tools and Materials You Will Need
Before beginning, ensure you have the correct gauge of metal, typically 26-gauge galvanized steel, aluminum, or copper, depending on your existing roofing material. Using the wrong thickness makes it difficult to achieve clean, sharp bends in tight spaces.
| Tool/Material | Purpose |
|---|---|
| Metal Brake or Hand Seamer | Creating precise, sharp bends in the flashing material. |
| Tin Snips (Left/Right/Straight) | Cutting the metal to the necessary custom dimensions. |
| Roofing Cement/Sealant | Providing a secondary moisture barrier at the seams. |
| Measuring Tape/Square | Ensuring the bend lines are perfectly perpendicular. |
Step-by-Step Guide to Fabricating and Installing Corner Flashing
- Measure the vertical height and horizontal depth of the chimney cricket’s corner. Add three inches to each side to allow for overlapping and potential adjustments during installation.
- Transfer these measurements to your sheet metal, marking the “bend line” clearly with a scribe or permanent marker. Ensure your lines account for the thickness of the metal.
- Use a metal brake to create the primary 90-degree bend that matches the angle of the chimney corner. If a brake is not available, use a hand seamer to fold the metal over a straight edge.
- Trim the excess metal at the corner intersection. You want to leave enough material to create a “tab” that can be folded over, effectively locking the corner shut and preventing water from entering the void.
- Dry-fit the piece against the cricket and chimney wall. Ensure that the flashing sits flush against the masonry and the roof deck without buckling.
- Apply a small bead of high-quality roofing sealant behind the flashing where it meets the chimney. Press the custom corner piece firmly into place and secure it using roofing nails, ideally through the top flange to keep the nail heads hidden under the next layer of shingles.
Common Mistakes to Avoid
One of the most frequent errors is failing to account for thermal expansion. Metal expands and contracts with temperature fluctuations; if you nail the flashing too tightly at every point, the metal may warp or tear at the corners over time. Always leave a small amount of “play” in the fasteners, or use a sliding cleat system if the chimney is particularly large.
Another common mistake is neglecting the underlayment. The metal flashing acts as the final shield, but the underlayment (such as ice and water shield) must be installed up the wall and over the cricket before the metal is placed. If the underlayment is not properly integrated, even the most perfectly bent metal will eventually fail.
The Importance of Counter-Flashing
While the step flashing handles the transition between the roof and the chimney, it is not enough on its own. You must always install counter-flashing that is embedded into the chimney mortar joints. This prevents water from running down the face of the chimney and slipping behind your newly installed step flashing. If you are working on an older chimney, ensure the mortar joints are sound before attempting to install any counter-flashing, as loose bricks will not hold the fasteners effectively.
Managing Water Flow and Drainage
When working around a cricket, remember that water volume is higher than on a standard roof slope. The cricket acts as a funnel. Consequently, your flashing must be tall enough to handle the increased flow. If the cricket is very steep, consider extending the flashing higher up the chimney wall than you would on a standard rake or eave. This extra height acts as insurance against heavy rain or snow accumulation that might otherwise overtop the flashing.
Frequently Asked Questions
Q: Can I use pre-bent flashing instead of custom-bending it myself?
A: While pre-bent flashing works for standard roof pitches, it rarely fits the unique, compound angles found on a chimney cricket. Custom bending is almost always required to achieve a watertight seal at these complex intersections.
Q: What is the best sealant to use with custom flashing?
A: Use a high-grade polyurethane roofing sealant or a specialized rubberized flashing adhesive. Avoid basic silicone, as it often fails to bond properly with masonry surfaces over the long term.
Q: How do I know if my corner bend is watertight?
A: Perform a light hose test after installation, spraying water from above the cricket and observing the transition point. If there is no moisture penetration behind the flashing or at the base of the chimney, your custom wrap is successful.
Final Considerations for Longevity
The lifespan of your flashing depends heavily on the quality of the metal and the precision of the bends. Copper is the gold standard due to its longevity and malleability, making it easier to work with when creating complex corner wraps. If using galvanized steel, ensure the edges are coated with a cold-galvanizing spray after cutting to prevent rust from starting at the exposed raw edges. By taking the time to measure, cut, and bend your flashing specifically for the cricket’s geometry, you ensure that the most vulnerable part of your roof remains the most protected.
📷 Photo by narodnatribuna.info








Leave a Reply