

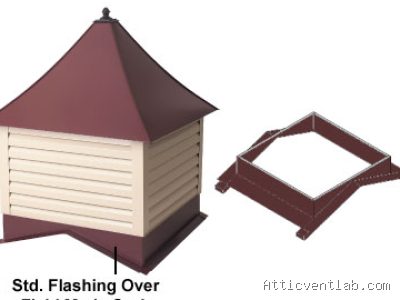
Atticventlab.com – Flashing a square attic cupola base on an asphalt shingle roof requires a precise multi-layer approach using metal flashing, ice and water shield membranes, and high-quality roofing sealant to create a watertight seal that prevents water intrusion at the roof-to-cupola transition. This process relies on the “shingle-lapping” method, ensuring that every layer of material overlaps the one below it to direct water away from the structure.
Understanding the Structural Challenge
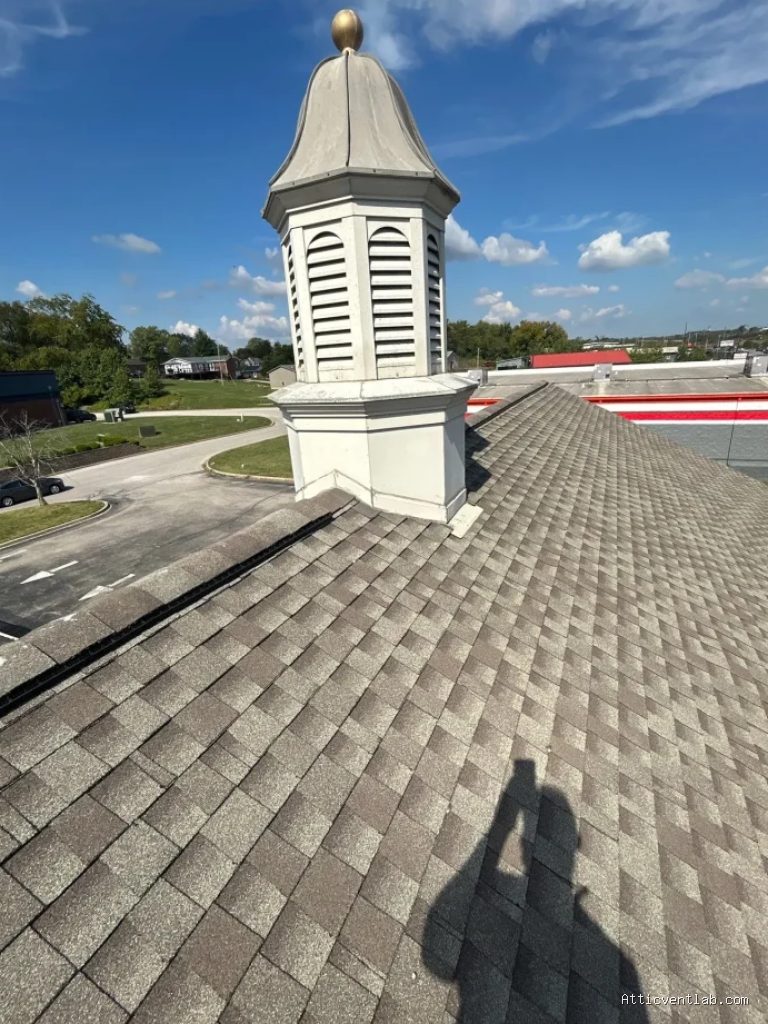
Installing a cupola on an existing asphalt shingle roof is a high-risk task because you are essentially creating a hole in the roof’s primary defense system. The intersection where the vertical wall of the cupola meets the slope of the roof is the most vulnerable point for leaks. If the flashing is not integrated correctly into the shingle course, water will pool against the wood base, leading to rot, mold, and severe damage to your attic framing.
Essential Tools and Materials
Before beginning, ensure you have the proper materials. Using generic hardware store sealants is a common mistake; you need professional-grade roofing cement or polyurethane sealant that remains flexible under extreme temperature fluctuations. You will also need aluminum or galvanized steel flashing, a tin snips, a roofing hammer, and high-temperature self-adhering membrane.
| Material | Purpose | Specification |
|---|---|---|
| Ice & Water Shield | Primary waterproofing layer | High-temperature rated |
| Step Flashing | Diverts water at corners | 5×7 inch or 6×8 inch metal |
| Roofing Cement | Final seal/adhesive | Plastic cement or poly-sealant |
| Roofing Nails | Mechanical fastening | 1.25 inch galvanized |
Step-by-Step Installation Process
Follow these steps to ensure a professional, leak-proof installation of your cupola base.
- Prepare the opening by cutting the roof deck to fit the cupola throat, ensuring you leave at least a 1-inch gap between the cupola base and the roof shingles for proper drainage.
- Install a layer of high-temperature self-adhering membrane around the perimeter of the opening, extending at least 6 inches up the vertical face of the cupola base and 12 inches onto the surrounding shingles.
- Begin the flashing process at the bottom (downhill) side of the cupola by installing an apron flashing that overlaps the shingles below it.
- Install step flashing along the sides of the cupola base, weaving each piece of flashing under the existing shingles and over the previous piece of flashing.
- Apply a generous bead of high-quality roofing sealant between the metal flashing and the vertical wall of the cupola base to seal the gap.
- Install the top (uphill) flashing, known as the “cricket” or “saddle” flashing, ensuring it sits on top of the shingles above the cupola to divert water around the structure.
- Secure the base of the cupola to the roof framing using heavy-duty lag screws, ensuring they are driven into rafters rather than just the roof sheathing.
Common Mistakes to Avoid
One of the most frequent errors is “face nailing” the flashing. Never drive nails directly through the vertical face of the flashing into the cupola wall if you can avoid it, as every hole creates a potential leak path. Instead, use a termination bar or ensure your flashing is tucked behind a trim board or siding. Another mistake is failing to account for thermal expansion. Metal expands and contracts; if your flashing is nailed too tightly, it will eventually buckle or tear the sealant, leading to hidden leaks.
Managing Risks and Maintenance
Even with a perfect installation, you must inspect the cupola flashing annually. Debris such as pine needles and leaves often gets trapped against the uphill side of the cupola. If this debris is not cleared, it creates a dam that forces water to back up under the shingles, bypassing your flashing entirely. If you notice signs of interior water staining in the attic near the cupola, check the sealant lines for cracking or separation immediately.
The Importance of the Cricket
For larger cupolas, a simple flashing job is insufficient. If the cupola is wide enough to obstruct water flow down the roof, you must build a small “cricket” or diverter on the uphill side. This creates a sloped surface that forces water to split and flow around the cupola base rather than hitting the back wall directly. Without this, even the best flashing will eventually fail under the pressure of heavy rain or snow melt.
Read also: Causes of Musty Smells in Upstairs Hallways During Humid Summer Days
📷 Photo by aicroofing.com
Frequently Asked Questions
Q: Can I use silicone caulk to seal the flashing to the shingles?
A: No. Silicone caulk does not adhere well to asphalt shingles and will peel off as the roof expands and contracts. Always use specialized asphalt-based roofing cement or polyurethane sealant specifically designed for roofing applications.
Q: How far should the flashing extend under the shingles?
A: The flashing should extend at least 4 inches under the shingles on all sides. This ensures that even if water manages to get past the initial seal, it is still directed on top of the shingle layer below it.
Q: Should I attach the cupola base directly to the shingles?
A: No, you should always attach the cupola base to the roof deck and rafters. The shingles are a sacrificial layer and do not provide the structural integrity required to hold a heavy cupola in high winds.
Final Considerations for Longevity
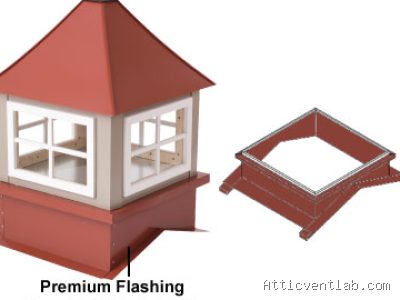
📷 Photo by metalcupolas.com
When selecting your flashing material, consider the climate of your region. In coastal areas, use stainless steel or copper to avoid rapid corrosion from salt air. In standard environments, galvanized steel or aluminum is sufficient. Always ensure that your nails are compatible with the flashing material to prevent galvanic corrosion, which can eat through metal flashing in as little as a few seasons. By following these technical standards, you ensure that your cupola remains an aesthetic asset rather than a liability to your roof’s integrity.
📷 Photo by metalcupolas.com








1 Comments
[…] Read AlsoHow to Flash a Square Attic Cupola Base on an Asphalt Shingle Peak […]