

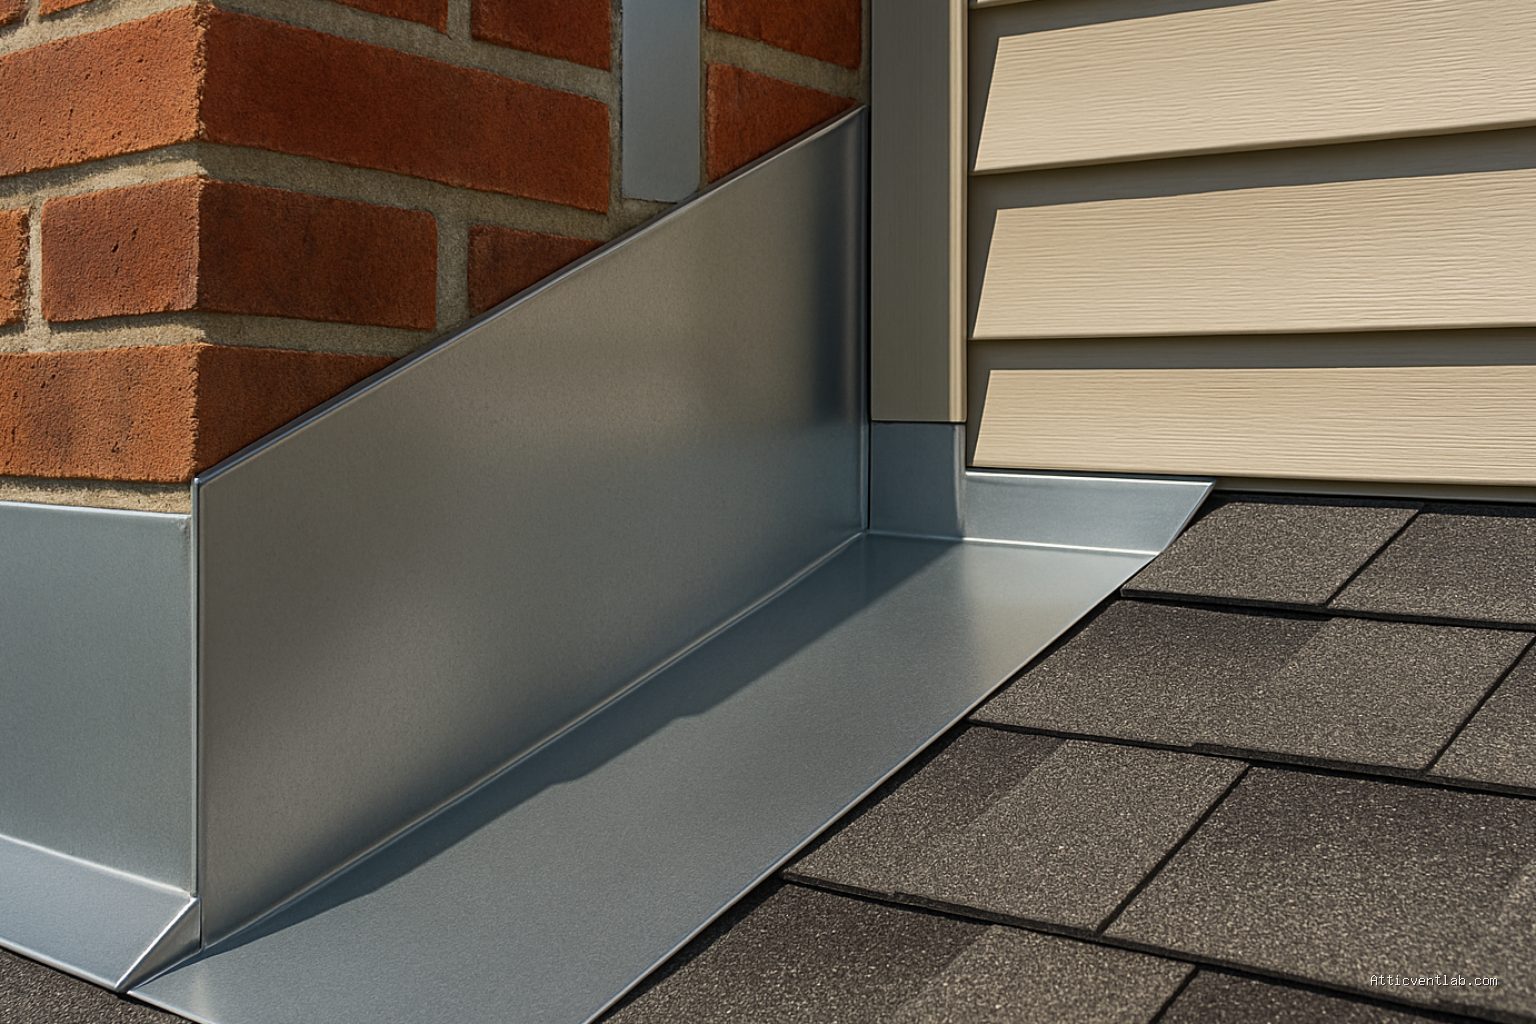
Atticventlab.com – To water-test step flashing behind siding, direct a low-pressure stream of water at the shingle-to-sidewall interface starting from the bottom of the roof slope and moving upward, while simultaneously inspecting the interior wall cavity or the back of the flashing for moisture intrusion.
Water intrusion at the roof-to-wall intersection is one of the most common sources of structural rot and mold in residential buildings. Step flashing is designed to divert water away from the wall and onto the shingles, but if the flashing is improperly installed—specifically if it is not tucked behind the house wrap or is missing a kick-out diverter—water can easily bypass the barrier. Testing this area with a garden hose is a diagnostic necessity when tracing mysterious leaks that appear only during wind-driven rain events.
Preparation and Safety Precautions
Before you begin, ensure you have safe access to the roof or the area where the roof meets the wall. Never attempt to walk on a roof that is steep, wet, or covered in debris. If the flashing is located on a second-story roof, use a sturdy extension ladder and have a spotter hold the base. You will need a helper inside the house to watch for immediate signs of leaking, as water can travel a significant distance from the point of entry before becoming visible on a ceiling or wall.
Avoid using high-pressure nozzle settings. The goal is to simulate natural rainfall, not to pressure-wash your siding. High pressure can force water through sealants or gaps that would otherwise remain watertight during a normal storm, leading to “false positive” results that cause unnecessary repairs.
Step-by-Step Testing Procedure
- Clear the roof area of any leaves, pine needles, or debris that might be damming water against the flashing.
- Position your helper inside the structure near the suspected leak area with a flashlight and a moisture meter if available.
- Start your water test at the lowest point of the flashing run, where the roof meets the gutter or eave.
- Use a garden hose on a gentle “shower” or “mist” setting to spray the area where the shingles meet the wall.
- Hold the hose steady for three to five minutes at each step-flashing segment, moving upward toward the ridge.
- Wait at least two minutes between each segment to allow water time to migrate through any potential gaps or cracks.
- Document the exact height and location where the water first appears inside the house, as this helps pinpoint which specific piece of flashing is failing.
Understanding the Variables of Water Intrusion
When conducting this test, it is vital to understand the difference between flashing failure and siding failure. Step flashing should always be layered underneath the house wrap or building paper. If the water only leaks when you spray the siding above the flashing, the issue may be a lack of a proper drainage plane behind the siding rather than a failure of the step flashing itself.
Read also: Causes of Whistling Wind Noises Through Attic Gable Louver Slats
Another common mistake is failing to account for the “kick-out” diverter at the bottom of the flashing. If this diverter is missing, water running down the wall will flow directly behind the gutter or the siding at the eaves. If your test shows water entering the wall at the very bottom of the roof slope, the lack of a kick-out diverter is almost certainly the culprit, even if the step flashing itself is perfectly sealed.
Diagnostic Checklist for Flashing Integrity
| Observation | Likely Cause | Recommended Action |
|---|---|---|
| Water appears immediately | Missing or rusted-through flashing | Replace flashing segments |
| Water appears after 5+ minutes | Improper overlap (shingle effect) | Re-install flashing with correct overlap |
| Leak occurs only at the eaves | Missing kick-out diverter | Install a proper kick-out diverter |
| Moisture on exterior sheathing | Torn house wrap | Seal or patch the building paper |
Common Pitfalls During Testing
One major error is over-saturating the area. If you soak the wall for thirty minutes, you may overwhelm the drainage capacity of the building’s exterior envelope, creating a leak that would never occur in real-world conditions. Stick to a systematic approach: spray for a few minutes, observe, and move on. If you do not see a leak, do not assume the system is perfect; move higher up the slope and continue the test.
Additionally, be aware of “wicking.” Sometimes, water travels along a nail shank or a wire penetration located near the flashing. If you find water inside, carefully inspect the area for any secondary penetrations. It is possible that the flashing is functioning correctly, but a nearby electrical outlet or light fixture mounting block is actually the true entry point.
Frequently Asked Questions
Q: How long should I spray each section during the test?
A: Three to five minutes per segment is usually sufficient to mimic a heavy rainstorm. If no water appears within this timeframe, move to the next section higher up the roof.
Q: Does the water temperature matter for the test?
A: No, the temperature of the water does not affect the diagnostic result. However, using cold water on a hot day can sometimes cause minor condensation on metal flashing, so ensure your helper differentiates between condensation and an active leak.
Q: Should I remove the siding to inspect the flashing?
A: Only remove siding if the water test confirms a leak and you have exhausted all other diagnostic methods. Removing siding is invasive and can damage the finish, so it should be the final step after you have localized the leak as accurately as possible with the hose.
Finally, always remember that roof leaks are rarely isolated incidents. If you discover that your step flashing is failing, check the condition of the shingles and the underlayment in the immediate vicinity. If the flashing is failing due to corrosion, it is highly likely that the surrounding fasteners are also reaching the end of their service life, and a comprehensive repair is often more cost-effective than a localized patch.
📷 Photo by americanqualityremodeling.com








1 Comments
[…] Read also: How to Water-Test Step Flashing Behind Siding with a Garden Hose […]