

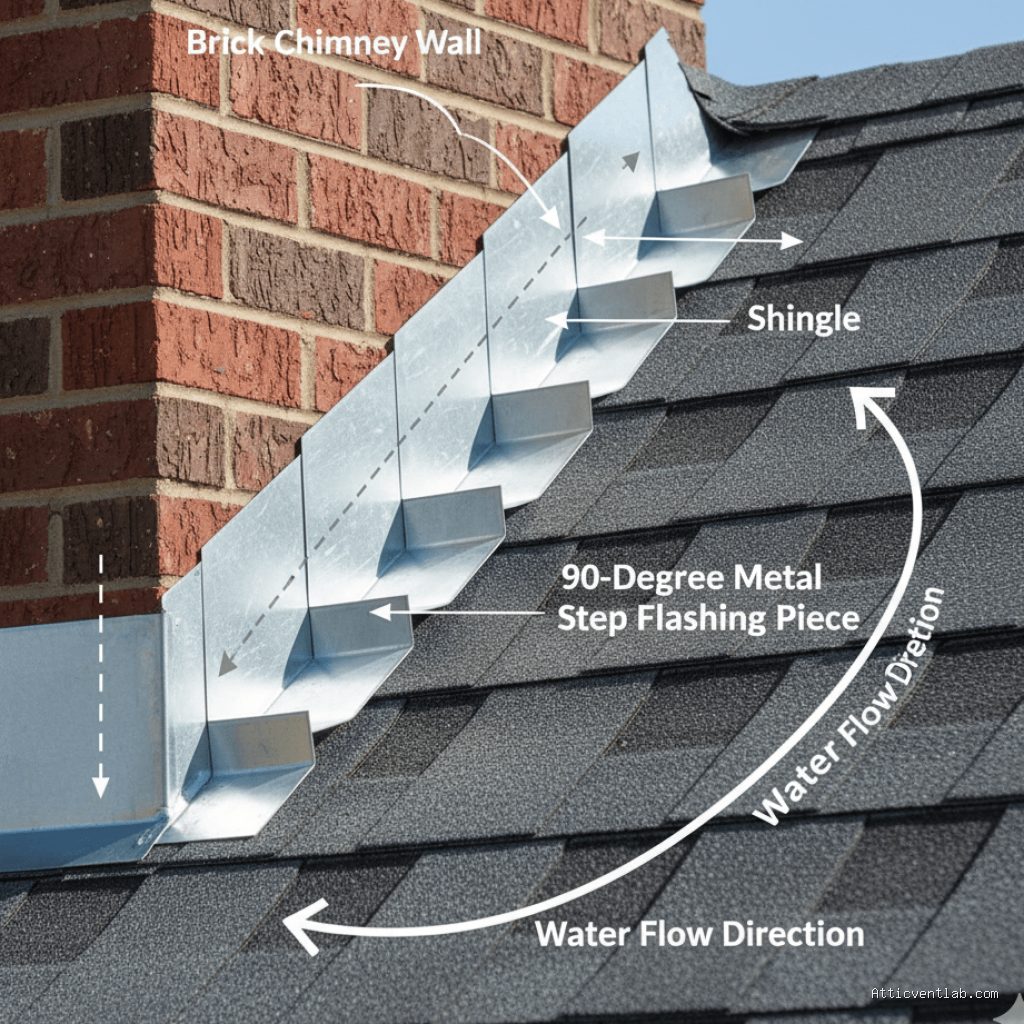
Atticventlab.com – Step flashing must never be nailed directly to the wall surface because it prevents the essential expansion and contraction of building materials, leading to catastrophic water infiltration behind the siding. Rigidly fastening the flashing creates a fixed point that inevitably causes metal fatigue or wall substrate cracking as the structure shifts.
The Mechanics of Thermal Movement
All building materials, including wood framing, metal flashing, and exterior siding, react to temperature fluctuations. Metal, in particular, expands and contracts significantly throughout the seasons. When a contractor nails step flashing directly through the vertical leg into the wall sheathing or studs, they effectively pin the metal in place. This lack of “float” forces the nail holes to enlarge over time, creating entry points for rainwater that bypasses the protective barrier entirely.
Furthermore, the house itself is a dynamic structure. It settles, shifts due to wind loads, and reacts to humidity levels. By securing the flashing tightly to the wall, you create a point of structural tension. If the house moves but the flashing cannot, the metal may buckle, warp, or pull away from the wall. This separation breaks the critical water-shedding seal, allowing moisture to wick behind the siding and into the structural framing, where it remains hidden until significant rot occurs.
The Correct Installation Principle: The Overlap Method
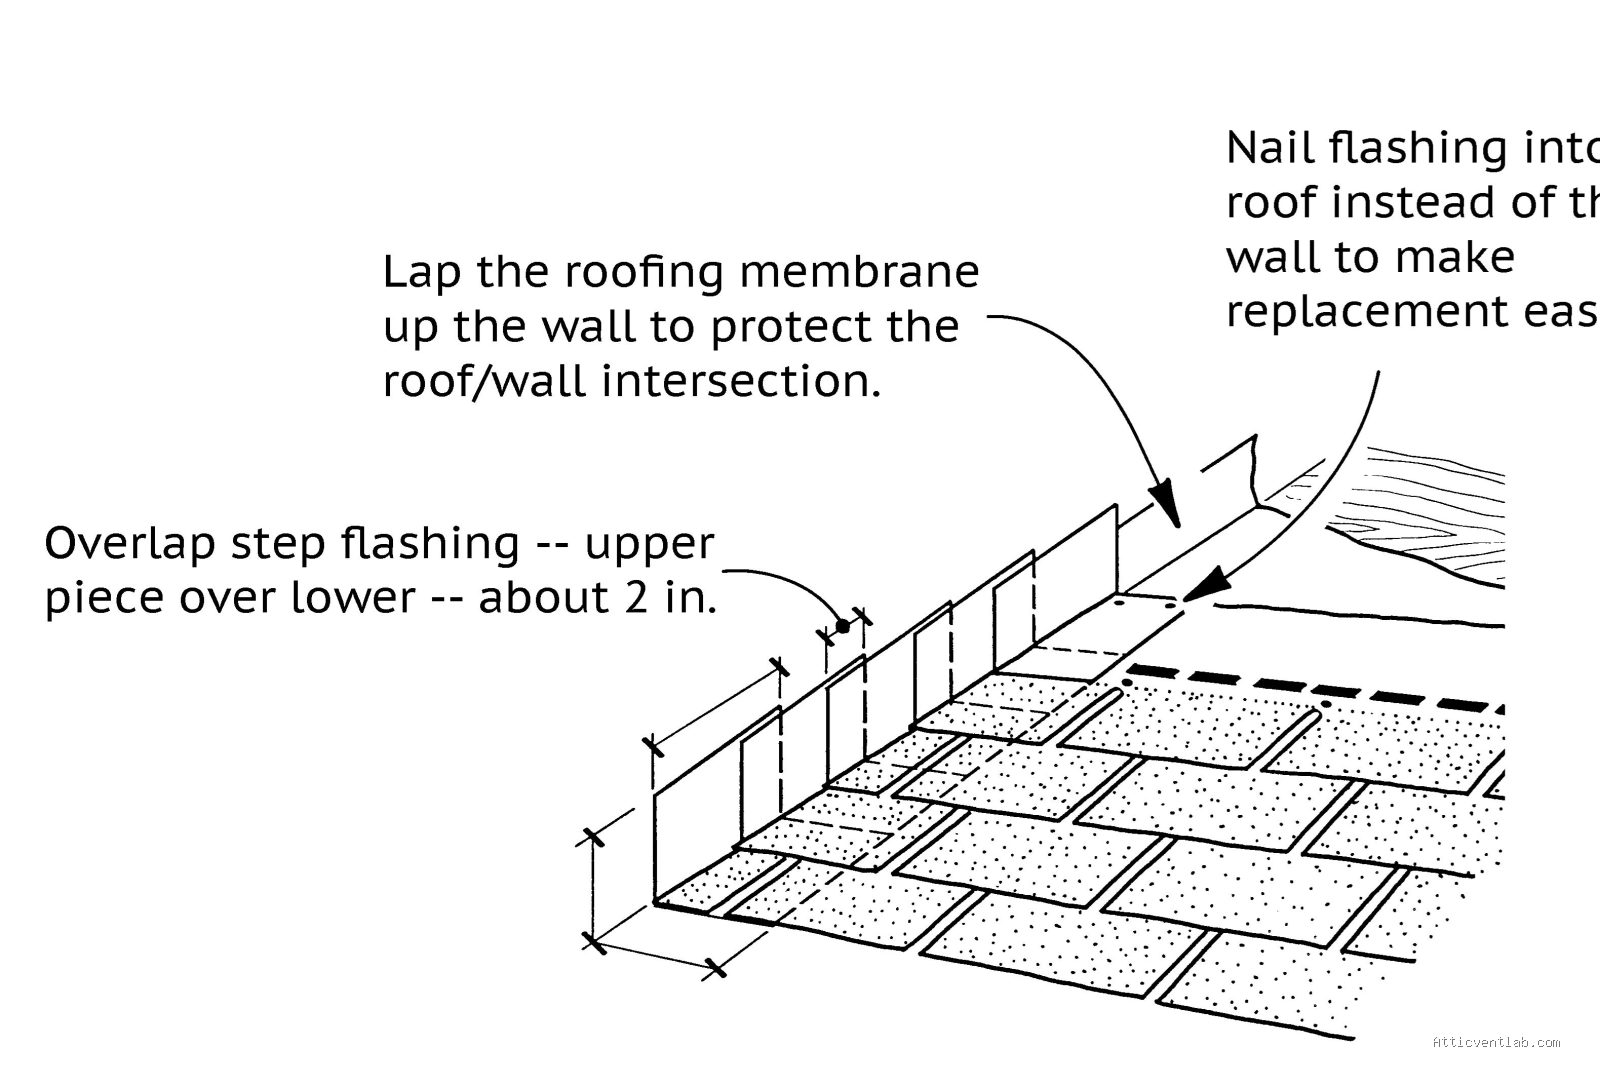
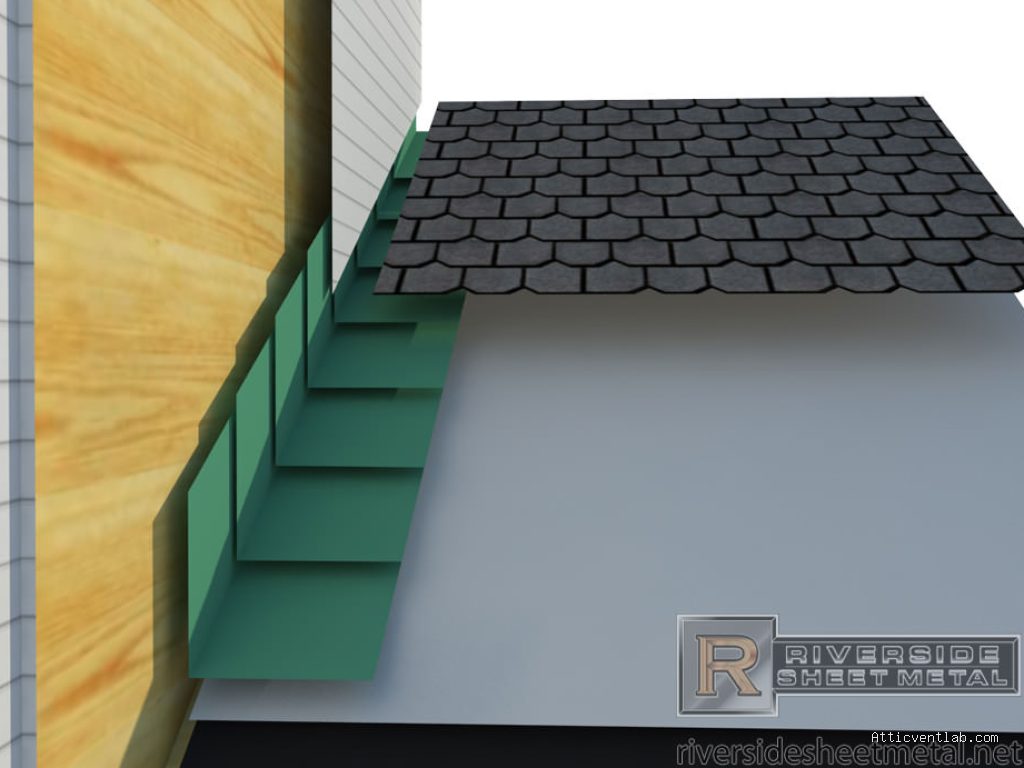
The fundamental rule of roofing and siding integration is that water must always be directed away from the building envelope. Step flashing is designed to be woven into the roof shingles and tucked behind the protective siding or house wrap. The vertical flange of the flashing should be held in place by the siding itself—not by nails driven through the flashing into the wall.
When the flashing is tucked behind the siding, it acts as a secondary drainage plane. If water gets past the exterior siding, it hits the vertical leg of the flashing and is directed down onto the roof surface, eventually exiting at the gutter. If you nail through that leg, you are essentially punching holes in your own drainage system. Even with sealant, these holes are destined to fail as the building moves.
Comparison of Installation Methods
📷 Photo by exonieqoj.blob.core.windows.net
| Feature | Direct Nailing (Incorrect) | Tucked Behind Siding (Correct) |
|---|---|---|
| Water Sealing | Compromised by nail holes | Maintained by overlap |
| Thermal Expansion | Restricted, leads to buckling | Accommodated by movement |
| Longevity | Prone to early failure/leakage | Matches lifespan of roof |
| Structural Integrity | Creates stress points | Protects wall substrate |
Step-by-Step Guide to Proper Step Flashing Integration
- Install the house wrap or moisture barrier first, ensuring it is properly lapped over the wall sheathing.
- Begin by installing the first piece of step flashing at the bottom of the roof-to-wall transition, ensuring it sits on top of the starter strip or the first course of shingles.
- Place the vertical leg of the flashing against the wall. Do not drive any nails through this vertical portion.
- Install the next course of shingles over the horizontal portion of the step flashing.
- Install the siding or counter-flashing over the vertical leg of the step flashing. The siding must overlap the vertical leg by at least two inches to ensure a proper water shed.
- Repeat this process, overlapping each piece of step flashing by at least three inches, ensuring that each subsequent piece is tucked behind the siding.
Common Mistakes and Risks
One of the most frequent errors observed by inspectors is the use of excessive caulk as a substitute for proper flashing geometry. Contractors often nail the flashing and then smear thick beads of roofing cement over the nail heads. While this might stop water for a few months, sealants degrade under UV exposure and thermal cycling. Once the sealant cracks, the nail hole becomes a direct funnel for water to enter the wall cavity.
Another risk involves the use of improper fasteners. Some installers use galvanized nails that react chemically with certain types of metal flashing, leading to corrosion. When the metal corrodes, the integrity of the entire flashing system is compromised. Always ensure that the flashing material—whether aluminum, copper, or galvanized steel—is compatible with the fasteners and the surrounding environment.
Signs of Flashing Failure
Read also: How to Adjust Attic Fan Humidistat Settings to Prevent Winter Moisture Rot
If you notice interior water stains near the intersection of a roof and a wall, the flashing is the primary suspect. Externally, look for rusted or buckled metal at the roof-to-wall junction. If you see nails exposed on the vertical surface of the flashing, you are looking at a ticking time bomb for water damage. Even if there is no interior leak yet, the presence of exposed nails is a clear indicator that the installation was performed incorrectly and will likely require remediation before significant mold or rot takes hold.
Frequently Asked Questions
Q: Is it ever acceptable to nail the vertical leg of step flashing?
A: Only in very specific circumstances where the flashing acts as a counter-flashing, and even then, the nails must be covered by a separate, overlapping piece of metal or siding to ensure they are never exposed to direct rainfall.
Q: What should I use instead of nails to hold the flashing in place during installation?
📷 Photo by narodnatribuna.info
A: You can use small amounts of high-quality construction adhesive to tack the flashing in place until the siding is installed, or rely on the friction of the shingles and the weight of the siding to keep it secure.
Q: Can I just cover the nail heads with high-quality exterior caulk?
A: No. Caulk is a maintenance item that will eventually fail. Relying on caulk to prevent water intrusion at a critical junction like a roof-to-wall transition is considered poor practice and will not provide a long-term, watertight seal.
Conclusion
Protecting the integrity of your roof-to-wall transition requires respecting the physics of building materials. By avoiding direct nailing and ensuring that step flashing is properly integrated behind the siding, you create a durable, weather-resistant barrier. Prioritizing correct installation techniques today will save you from the expensive, hidden costs of water damage and structural repairs tomorrow.
📷 Photo by roofing-cop.com








1 Comments
[…] Read also: Why Step Flashing Must Not Be Nailed to the Wall Surface Directly […]