

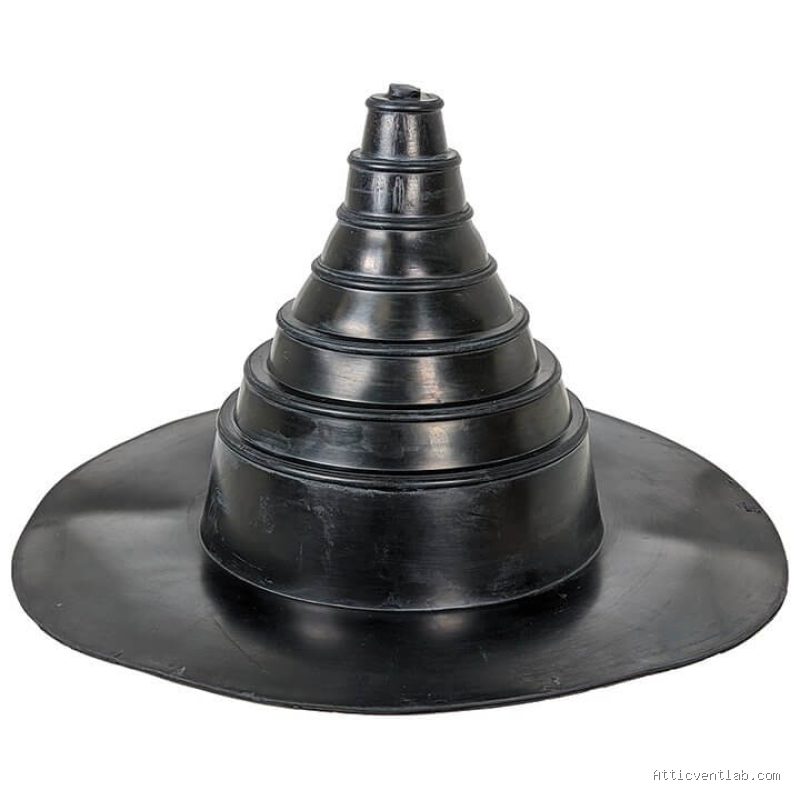
Atticventlab.com – Cracked rubber boots on metal roof pipe penetrations are best repaired by applying a high-grade UV-resistant polyurethane sealant or a specialized EPDM repair patch to seal the fissures and prevent moisture intrusion into the attic space.
Rubber pipe boots, technically known as roof flashings, are the silent workhorses of a metal roofing system. They are designed to accommodate the thermal expansion and contraction of plumbing stacks or exhaust vents. However, constant exposure to intense ultraviolet radiation, extreme temperature fluctuations, and ozone degradation eventually causes the synthetic rubber to become brittle, leading to hairline cracks that serve as direct entry points for rainwater.
Identifying the Severity of the Damage
Before initiating a repair, you must determine whether the rubber boot is salvageable or if it requires a total replacement. If the rubber is still pliable and the cracks are superficial or limited to the upper portion, a patch or sealant repair is a viable cost-effective solution. Conversely, if the rubber is crumbling to the touch, missing large chunks, or has pulled away from the metal base plate, a complete replacement of the flashing is non-negotiable to prevent interior water damage.
Common signs of failure include:
- Water staining on the underside of the roof decking or attic rafters.
- Visible spiderweb cracks radiating from the center of the boot.
- The rubber collar no longer sits snugly against the pipe, creating a visible gap.
- Discoloration, specifically a chalky white or grey appearance, indicating advanced UV damage.
Material Selection for Effective Repairs
Not all sealants are created equal. Avoid using standard silicone caulk, as it often fails to adhere long-term to the specific polymers used in roofing boots and lacks the necessary flexibility to withstand metal roof thermal movement. Instead, prioritize products designed for exterior roofing applications.
| Material Type | Best Use Case | Key Advantage |
|---|---|---|
| Polyurethane Sealant | Hairline cracks and small tears | Superior adhesion and flexibility |
| EPDM Repair Tape | Larger punctures or seam failures | Waterproof, UV-stable, and immediate cure |
| Roofing Cement (Mastic) | Emergency temporary patches | High viscosity for uneven surfaces |
Step-by-Step Repair Guide
Follow these steps to ensure a long-lasting seal that will hold up against the elements. Safety is paramount; ensure you have a secure ladder and proper fall protection equipment before stepping onto a metal roof, which can be extremely slippery even when dry.
- Clean the surface area thoroughly using a dry rag and isopropyl alcohol to remove dust, oxidation, and bird droppings.
- If using a liquid sealant, apply a generous bead directly over the crack, extending at least an inch beyond the damaged area in all directions.
- Use a putty knife or a gloved finger to smooth the sealant, ensuring it is pressed firmly into the crack to create a seamless bond.
- If utilizing an EPDM patch, cut a piece slightly larger than the damaged section, peel the backing, and press firmly from the center outward to eliminate air bubbles.
- Inspect the base of the boot where it meets the metal roofing panels; if the original screws have loosened, tighten them or replace them with oversized gasketed roofing screws to ensure a watertight fit.
Risks of Neglecting Rubber Boot Maintenance
Ignoring a small crack in a rubber boot is one of the most common causes of “hidden” roof leaks. Because metal roofs are highly efficient at shedding water, a leak at the pipe penetration often travels along the roof decking, hidden from view, until it reaches a rafter or a wall cavity. By the time you notice a water spot on your ceiling, the wood structure inside your attic may already be suffering from rot, mold growth, or insulation degradation.
Furthermore, small cracks tend to grow exponentially during the winter months. As water enters the crack and freezes, it expands, effectively turning a hairline fracture into a significant tear. This process, known as freeze-thaw cycling, can turn a simple five-minute maintenance task into a major roof repair project if left unattended for too long.
Proactive Maintenance Tips
The best way to manage pipe penetrations is through preventative maintenance rather than reactive repairs. Inspect your roof visually at least twice a year—ideally after the harshest weather season in your region. Look for debris like tree branches or leaves that may be resting against the boot, as these can trap moisture and accelerate the breakdown of the rubber material.
If you live in a region with extremely high UV index, consider applying a UV-protective coating to the rubber boot during its first year of service. This sacrificial layer can significantly extend the lifespan of the rubber by preventing the initial photochemical breakdown that leads to cracking.
Q: Can I use duct tape for a temporary fix on a cracked roof boot?
A: No. Duct tape is not UV-resistant and will lose its adhesive properties within a few weeks of sun exposure, leaving a sticky, difficult-to-remove residue that prevents proper repair materials from adhering later.
Q: How long should a repaired rubber boot last?
A: When repaired with high-quality polyurethane sealant or EPDM tape, the patch can last anywhere from three to five years, though the boot should be monitored annually for signs of further degradation.
Q: Is it better to patch or replace the entire boot?
A: If the rubber is still flexible, patching is perfectly acceptable. However, if the rubber is brittle, cracking in multiple places, or the base seal is compromised, replacing the entire flashing is the only way to guarantee a permanent, watertight solution.
Ultimately, the longevity of your metal roof is tied to the integrity of its weakest points. By taking the time to inspect and repair your rubber pipe boots promptly, you protect the structural health of your home and avoid the frustration of interior water damage.
📷 Photo by storage.googleapis.com








Leave a Reply