

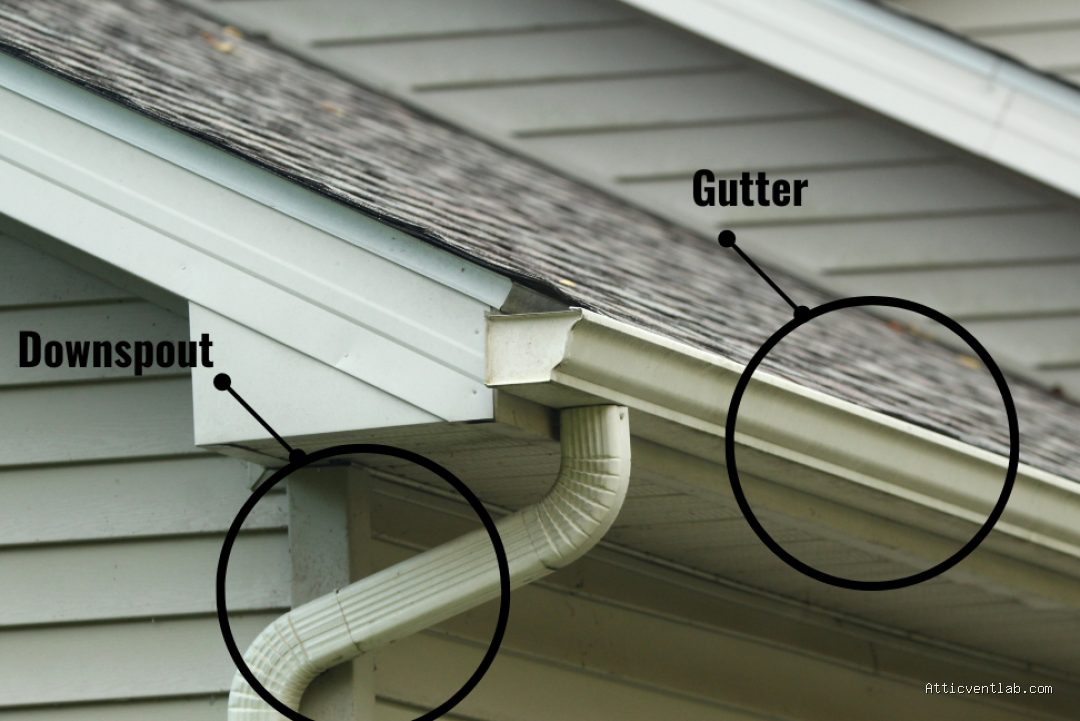
Atticventlab.com – Rerouting water from a high-level gutter spout that drains onto lower flashing requires installing a gutter extension, a flexible downspout elbow, or a splash block to divert the flow directly into the lower gutter system. This prevents water from pooling against the flashing, which is a primary cause of roof leaks and premature material deterioration.
The Hidden Danger of Improper Downspout Drainage
When an upper-level gutter empties directly onto a lower section of roof flashing, you are essentially creating a concentrated waterfall on a surface not designed to handle high-volume runoff. Over time, the constant water pressure erodes the sealant along the flashing, causes rust in metal components, and leads to water infiltration beneath the shingles. This is a common architectural oversight in multi-story homes or homes with complex roof lines, often resulting in hidden rot within the roof decking.
Identifying Signs of Flashing Damage
Ignoring this drainage issue can lead to significant structural damage. Before attempting a repair, inspect the area for specific warning signs. Look for peeling paint on the fascia boards, moss growth around the flashing area, or granular loss on the shingles directly below the spout. If you notice dark stains or soft spots on the wood beneath the shingles, the water has already begun to penetrate the building envelope.
Recommended Solutions for Water Diversion
There are three primary ways to solve this problem, depending on the distance between the upper spout and the lower gutter. For minor adjustments, a simple downspout elbow is sufficient. For more complex angles, flexible corrugated downspout extensions are the industry standard. In rare cases where the upper gutter is too far from the lower one, you may need to install a custom-fabricated splash guard or a transition piece to guide the water safely.
Comparison of Rerouting Methods
| Method | Best Use Case | Difficulty | Durability |
|---|---|---|---|
| Downspout Elbow | Minor angle adjustments | Easy | High |
| Flexible Extension | Long distances or offsets | Easy | Medium |
| Custom Splash Guard | High-volume flow areas | Moderate | High |
| Downspout Extension | Draining into lower gutter | Moderate | High |
Step-by-Step Guide to Installing a Downspout Extension
Follow these steps to safely redirect water into your lower gutter system and away from the flashing.
- Measure the distance from the end of the upper downspout to the entry point of the lower gutter. Ensure you account for a slight downward slope to maintain gravity flow.
- Remove the existing bottom elbow of the upper downspout using a drill or screwdriver to remove the sheet metal screws.
- Attach a new downspout extension or a flexible elbow to the end of the downspout. Use aluminum pop rivets or short sheet metal screws to secure the connection.
- Ensure the end of the extension is positioned inside the lower gutter, preferably pointing in the direction of the lower gutter’s natural flow.
- Use a downspout strap to secure the extension to the wall or the roof fascia, ensuring it does not vibrate or shift during heavy rainfall.
- Seal any gaps at the connection point with high-quality gutter sealant to prevent leaks during heavy storms.
Common Mistakes to Avoid
One of the most frequent errors homeowners make is creating a connection that is too rigid. If the downspout is fixed too tightly to the wall, thermal expansion and contraction of the house can cause the screws to pull out or the metal to crack. Always allow for a tiny amount of “play” in the system. Another mistake is failing to account for the velocity of the water. If the extension is not properly anchored, the force of the water exiting the spout can cause the extension to disconnect or rattle against the siding.
Maintenance and Long-Term Prevention
Even after rerouting the water, you must maintain the gutter system to prevent clogs. If the upper gutter becomes clogged, water will overflow regardless of where the downspout is directed. Install gutter guards or mesh screens to keep debris out of the upper system. Regularly inspect the connection point every spring and autumn to ensure that the fasteners remain tight and the sealant has not dried out or cracked.
Frequently Asked Questions
Q: Can I just use a splash block instead of rerouting?
A: Splash blocks are designed for ground-level use. Using one on a roof surface is ineffective and dangerous, as it can slide off or become a projectile during high winds, potentially damaging the roof or windows below.
Q: Is it better to use PVC or aluminum for the extension?
A: Aluminum is preferred for most residential gutter systems because it is lightweight, matches existing aesthetics, and expands/contracts at a similar rate to the rest of your gutter system. PVC is durable but often looks out of place and can become brittle in extreme cold.
Q: How do I prevent the new extension from leaking at the joints?
A: Always overlap your connections in the direction of the water flow. Apply a bead of gutter-grade silicone sealant inside the joint before sliding the pieces together and fastening them with screws. This creates a watertight seal that lasts for years.
Final Considerations for Roof Health
Proper water management is the single most effective way to extend the lifespan of your roof. By ensuring that water is channeled directly into the gutter system rather than cascading over flashing, you reduce the humidity levels around your roof edges. This simple modification is a cost-effective preventative measure that protects the integrity of your home’s perimeter, preventing expensive water damage repairs down the road.
📷 Photo by pinnacleroofingassociates.com








Leave a Reply