

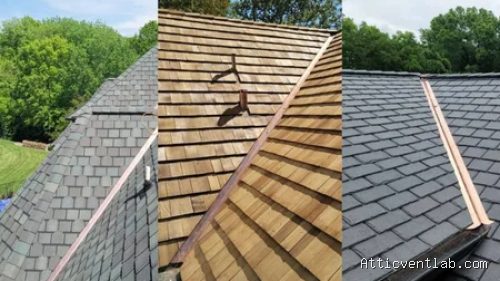
Atticventlab.com – Solder cracks on old copper valley seams primarily occur due to thermal expansion and contraction cycles that fatigue the rigid metal, which can be permanently repaired by cleaning the joint, applying fresh flux, and reflowing new solder using a high-heat propane or MAPP gas torch.
Copper valleys are the unsung heroes of traditional roofing, designed to channel massive amounts of water away from the roof deck. However, copper is a living material that reacts significantly to temperature swings. During the day, the metal expands under the sun; at night, it contracts. Over decades, this constant movement stresses the soldered seams, which are inherently rigid. When the solder loses its elasticity or the copper oxidizes, the bond fails, leading to hairline cracks that allow water to seep directly into the roof underlayment.
Identifying the Signs of Failure
The most dangerous aspect of a cracked valley seam is that it often remains invisible until significant water damage has already occurred inside the home. You should inspect your copper valleys during dry weather by looking for jagged, dark lines running along the center of the seam. If you see bubbling, peeling, or a white, powdery residue (copper sulfate) near the joints, the integrity of the solder is already compromised.
Ignoring these cracks leads to rotted roof decking, damaged rafters, and eventual interior ceiling staining. Because copper is a premium material, these seams should last for fifty years or more, but they require periodic maintenance. If you spot a crack, do not resort to using roofing cement or silicone caulk; these materials trap moisture and accelerate the corrosion of the copper, making a professional solder repair much harder later on.
Tools and Materials Needed for Repair
To perform a professional-grade torch repair, you need more than just a soldering iron. A high-heat torch is essential because copper acts as a heat sink, drawing energy away from the joint rapidly.
| Item | Purpose |
|---|---|
| Propane or MAPP Gas Torch | Provides enough heat to bring copper to the solder melting point |
| Acid Flux | Cleans oxidation and prepares the metal for bonding |
| 50/50 or 60/40 Lead-Tin Solder | The standard alloy for effective copper bonding |
| Wire Brush | Mechanically removes surface grime and oxidation |
| Emery Cloth | Polishes the copper surface for a clean, tight seam |
Step-by-Step Torch Repair Guide
Repairing a cracked copper seam is a precise process that demands patience. If the copper is wet, the solder will not adhere, so ensure the roof is completely dry before beginning.
Read also: How to Unclog Frozen Soffit Vents Blocked by Overhanging Gutter Slush
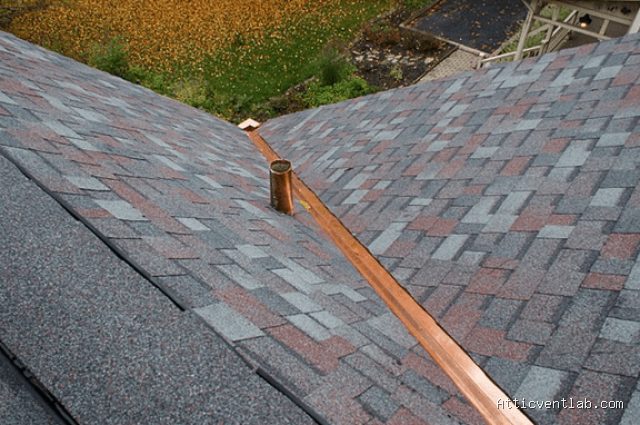
📷 Photo by roofingexperts.ie
- Clear the area around the crack by removing all old debris, leaves, and previous amateur repair attempts like tar or caulk.
- Use a wire brush and emery cloth to scrub the copper until it shines like a new penny; solder will not bond to oxidized or dirty copper.
- Apply a generous amount of acid flux to the seam, ensuring it penetrates deep into the crack to remove microscopic impurities.
- Light your torch and gently heat the copper surrounding the seam, moving the flame back and forth to distribute the heat evenly; do not hold the flame in one spot to avoid melting through the thin copper.
- Touch your solder wire to the seam once the metal is hot enough to melt it on contact; allow the molten solder to be drawn into the crack via capillary action.
- Let the metal cool naturally without adding water, as rapid cooling can cause the new solder joint to become brittle and crack again under stress.
Common Mistakes to Avoid
One of the most frequent errors homeowners make is “cold soldering.” This happens when the solder is melted by the flame of the torch rather than the heat of the copper itself. If the copper isn’t hot enough, the solder will sit on top of the surface like a bead of glue rather than bonding with the metal. This creates a weak seal that will fail at the first sign of a temperature drop.
Another mistake is failing to clean the seam properly. Copper oxidizes almost instantly when exposed to air. If you clean the metal and wait too long to apply the flux and solder, a new layer of oxidation will form, preventing a proper bond. Always perform the cleaning and soldering in one fluid, efficient motion.
Safety Considerations
Working with open flames on a roof presents a significant fire risk. Always keep a fire extinguisher nearby and ensure that the roof deck underneath the copper is not comprised of dry, flammable materials that could catch fire from conducted heat. If the copper is laid directly over dry wood, consider placing a piece of fire-resistant backer board under the section you are heating to shield the decking.
Q: Can I use a regular soldering iron instead of a torch?
A: Generally, no. A standard electronics soldering iron lacks the wattage to overcome the heat-sink properties of roof-grade copper. A torch is required to reach the necessary temperature for a structural seam repair.
Q: Why does my solder crack again after a few months?
A: This is usually due to “bridging” or an insufficient expansion joint. If the copper is fixed too tightly, it cannot expand, causing the rigid solder to snap. Ensure the copper has room to move, or consider installing a folded expansion cleat in the valley.
Q: Is it safe to leave lead-based solder on my roof?
A: Yes, standard lead-tin solder is the industry standard for copper roofing. While the runoff is not suitable for drinking water collection, it is perfectly safe for standard residential drainage systems.
Maintaining your copper valleys is an investment in the longevity of your entire structure. By understanding the mechanical stresses placed on these seams and applying the correct torch-repair techniques, you can stop small leaks before they compromise the integrity of your roof deck.
📷 Photo by billraganroofing.com








1 Comments
[…] Read also: Why Solder Cracks on Old Copper Valley Seams and How to Torch Repair It […]