

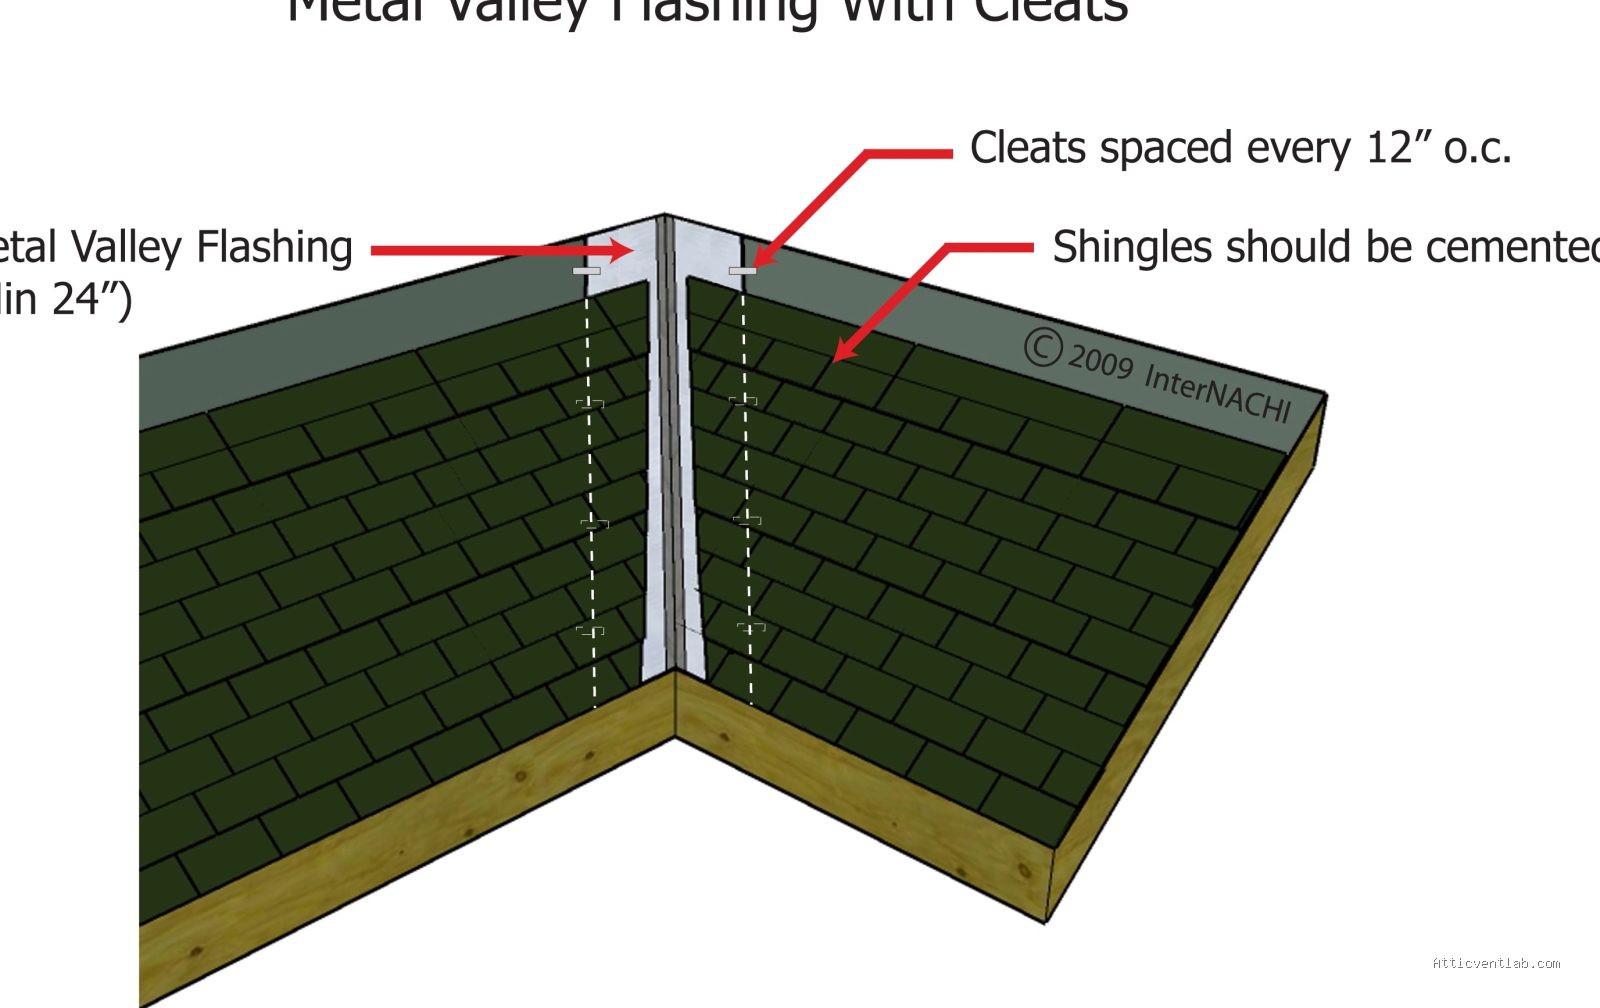
Atticventlab.com – A buckled valley flashing pan typically occurs due to thermal expansion, improper fastening, or trapped debris, and it is fixed by carefully loosening the surrounding shingles, flattening or re-securing the metal, and resealing the area with high-grade roofing cement to prevent water intrusion.
Roof valleys are the most vulnerable points of any pitched roof system. Because they collect the largest volume of runoff, any structural failure, such as a buckled metal pan, creates an immediate pathway for water to penetrate the underlayment and deck. When the flashing buckles, it forces the adjacent shingles upward, creating a gap that invites wind-driven rain and snow to bypass the protective layer.
Understanding the Mechanics of Buckling
Metal valley flashing is designed to expand and contract with temperature fluctuations. If the installer nailed the edges too tightly, or if the flashing was installed without sufficient clearance for movement, the metal will eventually “oil can” or buckle under stress. This vertical displacement acts like a wedge, lifting the surrounding shingles and breaking the seal created by the roofing nails and adhesive strips.
Beyond thermal stress, debris accumulation is a primary culprit. Leaves, pine needles, and sediment trap moisture against the metal. Over time, this debris creates a dam that forces water to flow horizontally rather than downward, causing the flashing to shift or lift. Once the metal loses its flush profile against the roof deck, the shingles lose their structural support, leading to the characteristic “hump” you see in the valley.
Tools and Materials Required
Before attempting a repair, ensure you have the correct tools. You will need a flat pry bar, a shingle ripper, high-quality roofing cement (specifically one designed for wet or dry conditions), galvanized roofing nails, and potentially a new section of valley flashing if the existing metal is cracked or irreparably deformed.
| Tool/Material | Purpose in Repair |
|---|---|
| Flat Pry Bar | Gently lifting shingles without damaging the asphalt granules. |
| Shingle Ripper | Cutting through old, rusted nails hidden under the shingles. |
| Roofing Cement | Sealing the underside of lifted shingles and around nail heads. |
| Galvanized Nails | Re-securing flashing or shingles to prevent future corrosion. |
| Heavy-duty Gloves | Protecting hands from sharp metal edges and abrasive shingles. |
Step-by-Step Repair Process
Repairing a buckled valley is a precise task that requires patience to avoid damaging the integrity of the shingles. Follow these steps to restore the valley to a watertight condition.
- Carefully lift the shingles adjacent to the buckling flashing using a flat pry bar. Work slowly to avoid cracking the shingle tabs, especially if the roof is older or the weather is cold.
- Locate the original nails holding the flashing down. If the metal is buckled because of a popped nail, remove the nail entirely. If the buckling is due to thermal stress, you may need to add additional fasteners, but always use a “floating” technique by not driving them flush against the metal to allow for future expansion.
- Clean the area thoroughly. Remove all debris, old hardened sealant, and grit from the valley pan. Use a wire brush if there is surface oxidation on the metal.
- Flatten the metal. If the buckle is significant, use a rubber mallet to gently tap the metal back into a uniform shape. Ensure the metal is lying completely flat against the underlayment.
- Apply a thin, consistent bead of roofing cement under the edges of the shingles that were lifted. Avoid over-applying, as excessive cement can prevent proper drainage and trap water.
- Press the shingles back into place and secure them with new galvanized roofing nails. Ensure the nails are driven into the shingle tabs well away from the center of the valley to prevent creating new leak points.
Common Mistakes to Avoid
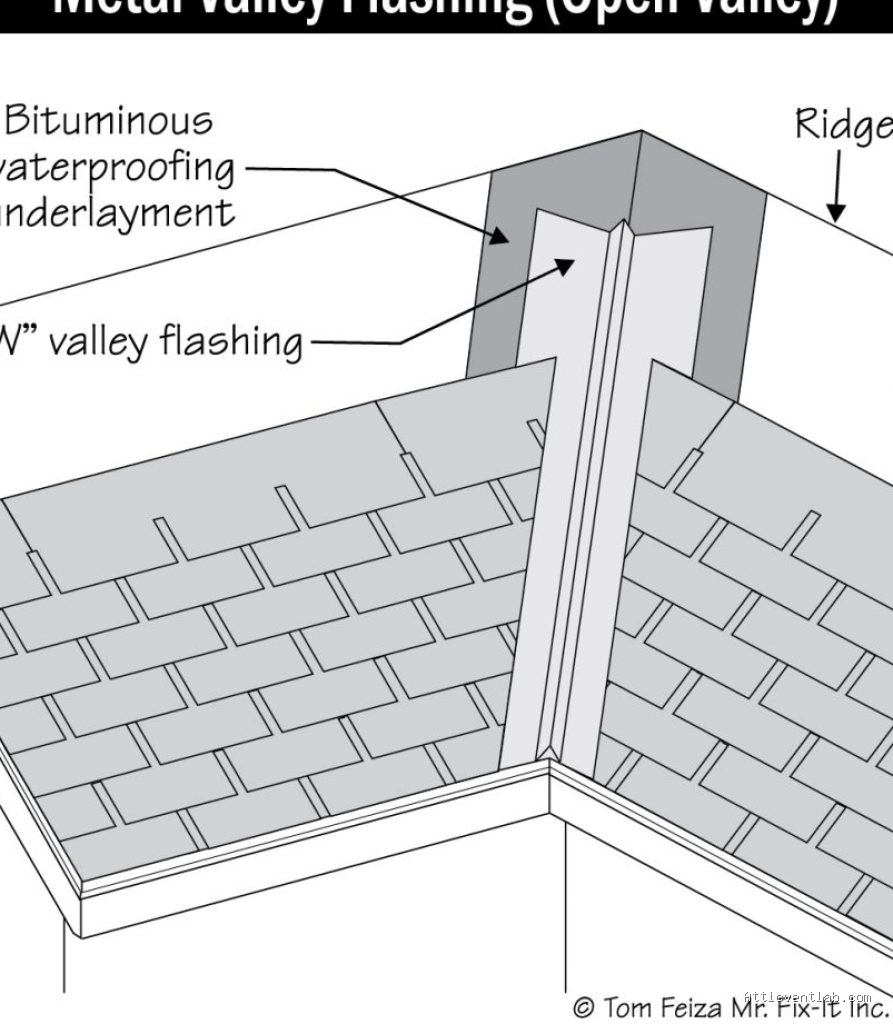
One of the most frequent errors during this repair is “face nailing” the valley. Never drive nails directly through the center of the valley flashing. Any hole placed in the center of the pan is a guaranteed future leak. Always secure the metal at the very edges, and ensure that the nail heads are covered by the overlapping shingles or a small dab of roofing cement.
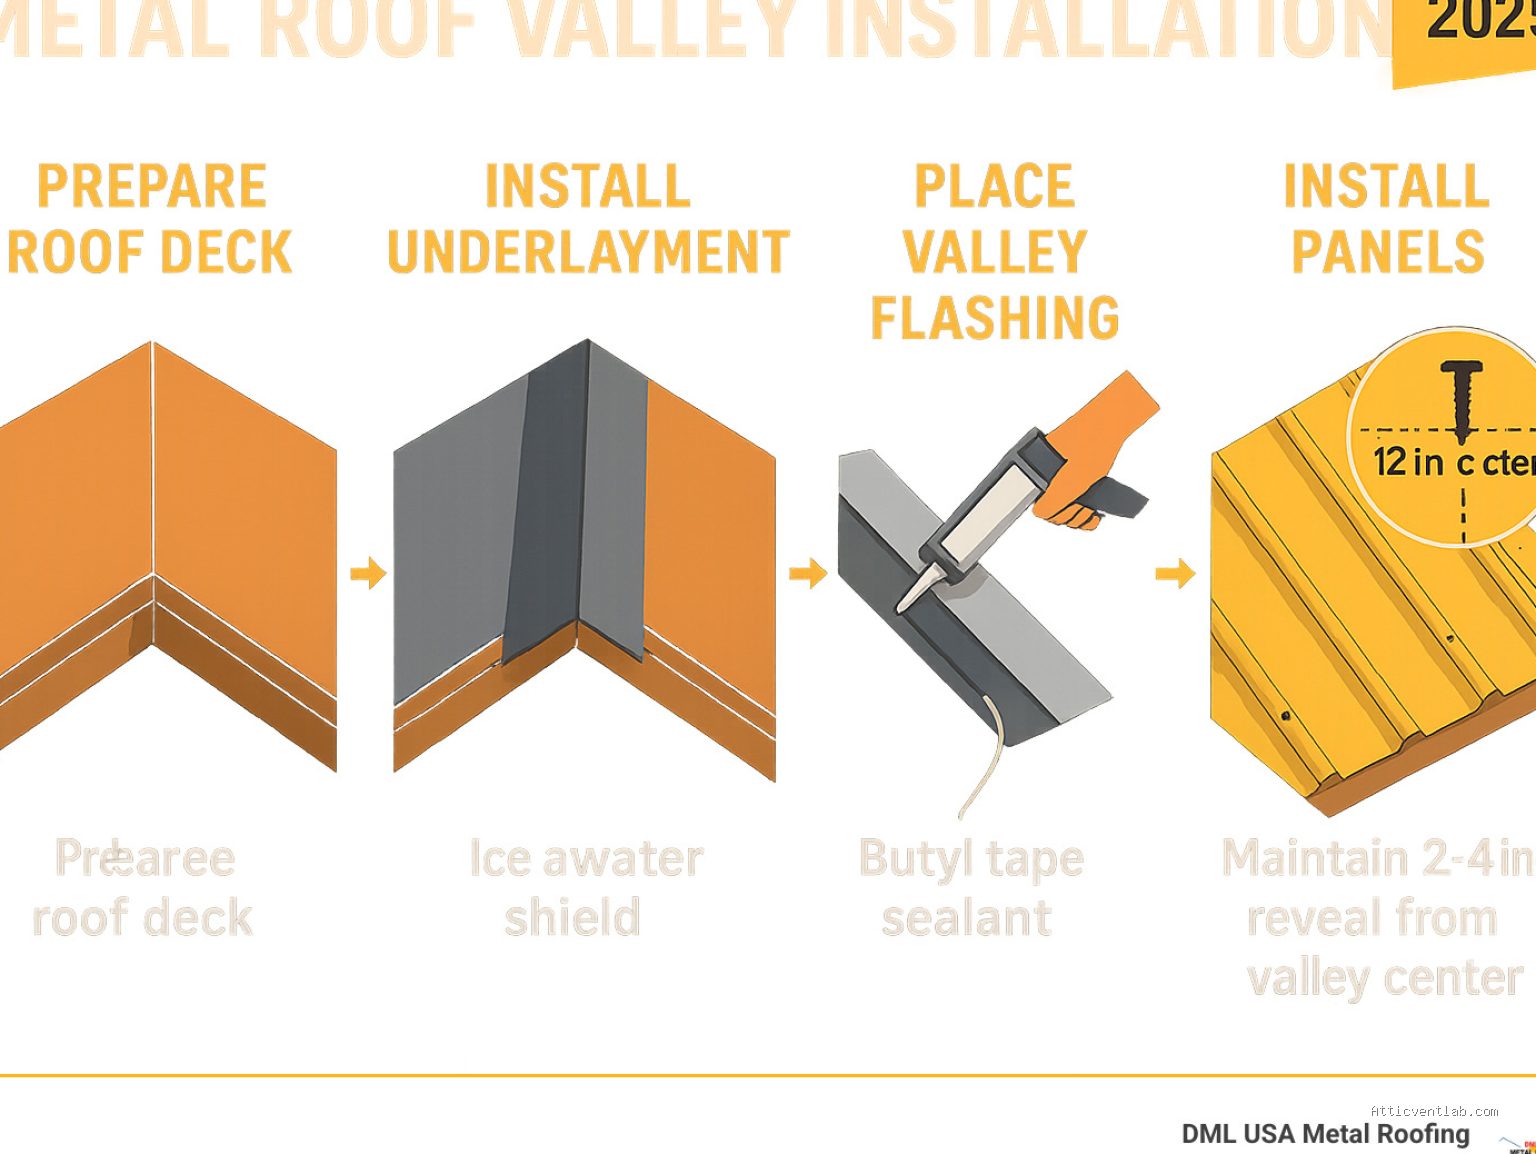
Another common mistake is neglecting the underlayment. If the flashing has been buckled for a long time, there is a high probability that the felt paper or synthetic underlayment beneath it has torn. If you notice signs of rot or water staining on the wood deck while the flashing is exposed, you must replace the damaged section of the underlayment before re-securing the metal.
Preventative Maintenance Tips
To prevent the flashing from buckling again, prioritize seasonal maintenance. At least twice a year—ideally in the spring and late autumn—clear all debris from the roof valleys. If you have overhanging tree branches, trim them back. These branches do more than just drop leaves; they shade the valley, keeping it cooler than the rest of the roof, which exacerbates the thermal expansion differential between the metal and the surrounding shingles.
📷 Photo by storage.googleapis.com
Additionally, inspect the condition of the metal itself. If the flashing shows signs of pitting or rust, it may be nearing the end of its lifespan. In such cases, patching a buckle is only a temporary fix, and a full valley flashing replacement may be necessary to protect the structural integrity of your roof.
Frequently Asked Questions
Q: Can I just hammer the buckle down without removing the shingles?
A: No. Attempting to hammer the buckle through the shingles will likely crack the shingles and may puncture the metal flashing, leading to severe interior leaks.
Q: Is it safe to use silicone caulk instead of roofing cement?
A: Avoid standard silicone. It often fails to adhere well to asphalt shingles and can degrade under UV exposure. Always use high-quality, bitumen-based roofing cement designed for flashing repairs.
Q: How do I know if the buckling is a sign of a bigger problem?
A: If the roof deck feels “spongy” or soft when you walk on it near the valley, the buckling is likely a symptom of structural water damage. In this scenario, contact a professional roofer for a comprehensive inspection.
📷 Photo by narodnatribuna.info
By addressing the buckle early, you prevent the localized issue from turning into a major roof replacement project. Regular inspections and proper installation techniques ensure that your valley flashing performs its job as the primary defense against water intrusion for years to come.
📷 Photo by nachi.org








Leave a Reply