

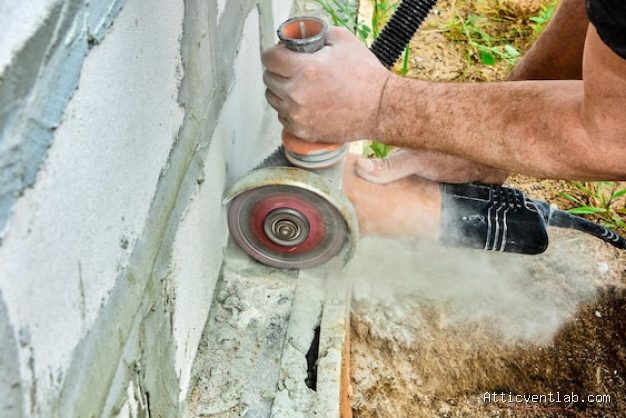
Atticventlab.com – Cutting kerf lines into mortar joints for reglet chimney flashing is the most effective method to create a watertight seal, involving the precise use of an angle grinder with a diamond masonry blade to insert metal flashing directly into the chimney brickwork.
Understanding the Reglet Flashing Method
Reglet flashing, often referred to as counter-flashing, is a professional-grade technique used to protect the vulnerable junction where a chimney meets a roof. Unlike surface-mounted flashing, which relies heavily on sealants that degrade under UV exposure, a reglet joint embeds the metal flashing into the mortar joint. This creates a mechanical bond that prevents water from running behind the flashing and into the chimney structure.
Performing this task requires precision. If you cut too deep, you compromise the structural integrity of the brick; if you cut too shallow, the flashing will not seat properly, leading to leaks. The goal is to achieve a clean, consistent slot that can accommodate the thickness of your metal flashing and a bead of high-quality polyurethane sealant.
Tools and Safety Requirements
Before beginning, ensure you have the proper personal protective equipment. Cutting mortar creates a significant amount of silica dust, which is hazardous to your respiratory system. You must wear a HEPA-rated respirator, safety goggles, and hearing protection. Additionally, ensure your angle grinder is equipped with a dust shroud or that you have a helper holding a shop vacuum nozzle directly at the cutting point to capture dust at the source.
Step-by-Step Guide to Cutting the Reglet
- Measure and mark your cut line using a chalk line or a carpenter’s pencil. The line should follow the slope of the roof, typically maintaining a height of 3 to 5 inches above the shingles.
- Equip your angle grinder with a 4-inch or 5-inch premium diamond masonry blade suitable for dry cutting.
- Begin the cut by gently scoring the mortar joint. Do not attempt to reach the full depth in one pass; use multiple shallow passes to maintain control and prevent the blade from binding.
- Aim for a depth of approximately 1 to 1.5 inches. This depth is standard for most reglet flashing installations and provides enough room for the metal tab and the subsequent sealant application.
- Once the cut is complete, use a hammer and a thin masonry chisel to carefully remove any loose mortar or debris from inside the joint to ensure a clean slot.
- Use a wire brush to scrub the interior of the joint. Any residual dust will prevent the sealant from bonding properly, which is the most common cause of future leaks.
Comparison of Flashing Installation Methods
| Feature | Surface Mounted Flashing | Reglet (Kerf) Flashing |
|---|---|---|
| Sealant Reliance | High (Primary seal) | Low (Secondary seal) |
| Longevity | 5–10 years | 20+ years |
| Installation Difficulty | Easy | Moderate/Advanced |
| Waterproofing Integrity | Prone to peeling | Superior mechanical bond |
Common Mistakes to Avoid
The most frequent error is cutting into the brick itself rather than the mortar joint. Brick is much harder than mortar and can cause the blade to kick back, resulting in injury or damage to the chimney face. Always keep the blade centered within the mortar bed. If the mortar joint is too thin, you may need to widen it slightly, but avoid encroaching on the structural brick units.
Another common mistake is failing to account for the thickness of the metal. If you are using heavy-gauge lead or copper, the slot must be wide enough to accommodate the metal plus the required amount of sealant. If the fit is too tight, you will force the sealant out during insertion, leaving the joint vulnerable to moisture intrusion.
The Importance of Proper Sealant Selection
Once the kerf is cut and the metal is inserted, the final step is sealing the joint. Never use standard silicone caulk, as it often fails to adhere to masonry and can be difficult to remove later. Use a professional-grade elastomeric polyurethane sealant designed specifically for masonry and metal joints. This material remains flexible, allowing for the thermal expansion and contraction that chimneys experience throughout the seasons.
Frequently Asked Questions
Q: Can I use an oscillating multi-tool instead of an angle grinder?
A: While a multi-tool can cut mortar, it is significantly slower and less efficient for a full chimney installation. An angle grinder is the industry standard for depth control and speed.
Q: What should I do if my mortar joints are crumbling?
A: If the mortar is soft or crumbling, you should repoint the chimney before attempting to cut a reglet. Cutting into compromised mortar will cause the joint to disintegrate further, making it impossible to secure the flashing.
Q: How do I handle corners when cutting the kerf?
A: When you reach a corner, stop the cut and use a small masonry chisel to carefully square off the turn. Do not try to bend the metal flashing around a sharp corner; instead, cut the metal to fit the corner and overlap it with a generous amount of sealant.
By following these steps and prioritizing safety, you create a permanent waterproofing solution that protects your home from water damage for decades. Proper reglet flashing is the mark of high-quality craftsmanship, ensuring that your chimney remains a durable and functional component of your roofing system.
📷 Photo by freepik.com








Leave a Reply