

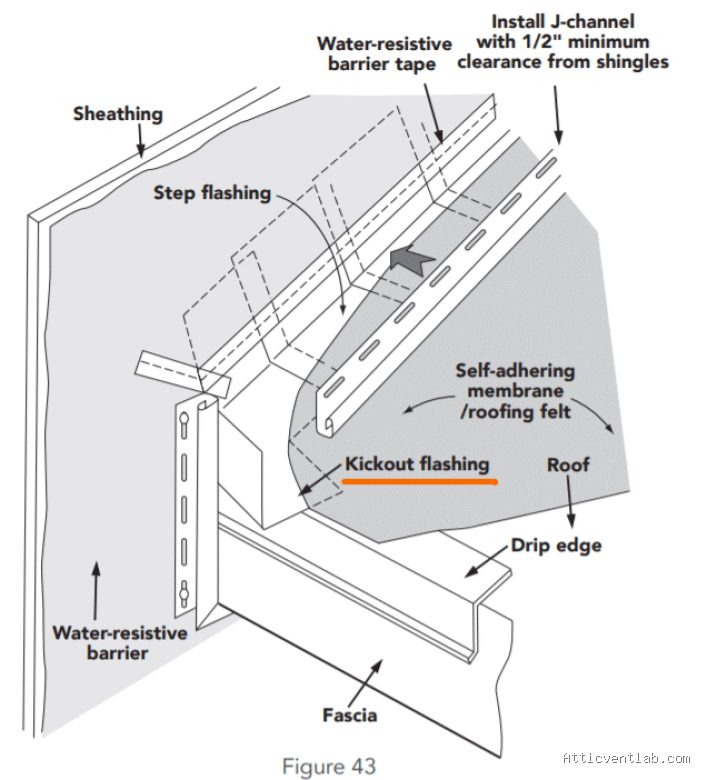
Atticventlab.com – To seal the seam between old step flashing and new vinyl siding, you must install a continuous bead of high-quality exterior-grade polyurethane sealant behind the J-channel and ensure proper shingle-lapping of the water-resistive barrier to prevent moisture infiltration.
Understanding the Critical Connection
The junction where roof step flashing meets vertical vinyl siding is one of the most common points of failure in residential building envelopes. Step flashing is designed to divert water away from the wall and onto the roof shingles, but when new siding is installed over old flashing, the transition often lacks a mechanical or chemical seal. Without a proper seal, wind-driven rain can bypass the siding, run behind the flashing, and rot the structural sheathing or rim joist of your home.
Homeowners often make the mistake of relying solely on the vinyl siding’s J-channel to keep water out. However, J-channel is not waterproof; it is a trim piece designed for aesthetics and to house the cut edges of siding panels. Relying on it to act as a primary flashing component is a recipe for long-term water damage.
Tools and Materials Needed
Before beginning the sealing process, ensure you have the correct materials. Using the wrong sealant can cause long-term issues, such as cracking due to thermal expansion or staining of the vinyl surface.
📷 Photo by storage.googleapis.com
| Item | Recommendation |
|---|---|
| Sealant | Polyurethane-based exterior caulk (non-silicone preferred for paintability and adhesion) |
| Flashing Tape | Self-adhering rubberized asphalt or butyl flashing tape |
| J-Channel | Matching vinyl J-channel or aluminum coil stock |
| Fasteners | Stainless steel or hot-dipped galvanized roofing nails |
Step-by-Step Sealing Process
Proper integration requires a methodical approach that respects the “water-shedding” principle: every layer must overlap the layer below it. Follow these steps to ensure a watertight transition.
- Inspect the existing step flashing for signs of corrosion, holes, or improper installation. If the metal is rusted through, it must be replaced before proceeding, as sealing over compromised flashing only traps moisture against the wood.
- Clean the surface thoroughly. Use a stiff brush and a damp cloth to remove dirt, debris, and oxidation from both the metal step flashing and the wall sheathing. A clean surface is essential for the sealant to achieve a permanent bond.
- Apply a bead of polyurethane sealant along the top edge of the step flashing where it meets the wall sheathing. This creates a primary gasket that prevents water from flowing horizontally under the flashing.
- Install a strip of self-adhering flashing tape over the top of the step flashing, extending at least two inches onto the wall sheathing. This creates a secondary line of defense and seals the nail heads that secure the flashing.
- Install your J-channel. Ensure the J-channel is positioned to allow water to drain onto the roof surface. Never caulk the bottom of the J-channel to the roof shingles, as this prevents water from escaping and creates a dam that forces water behind the flashing.
- Apply a final bead of sealant along the top edge of the J-channel where it meets the house wrap or siding substrate. This prevents water from running behind the siding and into the channel assembly.
Common Mistakes and Why They Fail
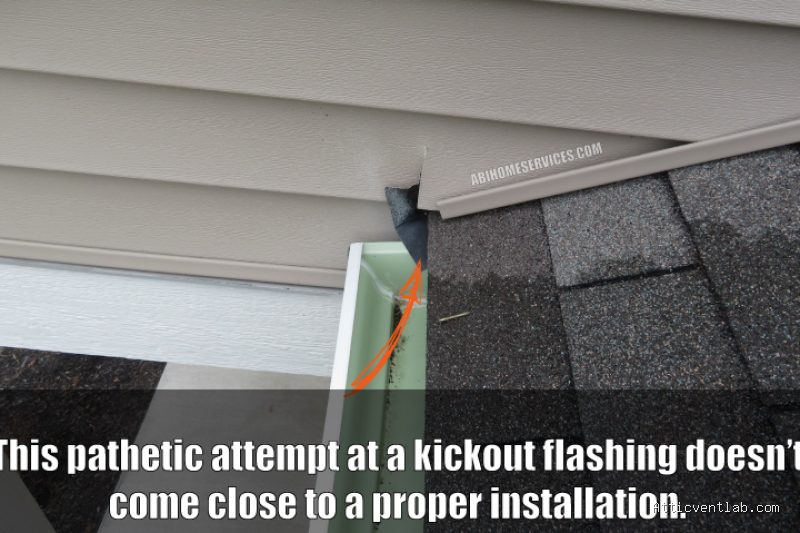
The most frequent error is “face-caulking” the exterior of the J-channel to the siding or the roof. While this may look neat, it is ineffective. If you seal the bottom edge, you prevent the system from breathing and draining. Any water that inevitably gets behind the siding will be trapped, leading to rapid degradation of the wall framing.
Another common issue is failing to account for thermal movement. Vinyl siding expands and contracts significantly with temperature changes. If you use a rigid caulk, like standard acrylic, it will pull away from the vinyl within a single season. Always use a high-performance polyurethane sealant that remains flexible under extreme temperature fluctuations.
Signs of Failure to Watch For
It is vital to monitor the area after the first heavy rain following your repair. Look for water stains on the interior of your attic or crawlspace near the roof-to-wall intersection. On the exterior, watch for “weeping” at the corners or behind the siding. If the siding appears to be buckling or the wood trim nearby feels soft to the touch, the seal has likely failed and requires immediate re-evaluation.
The Role of House Wrap
Never install vinyl siding directly against wood sheathing. A high-quality water-resistive barrier (house wrap) must be present. When installing your flashing, the house wrap should overlap the top flange of your flashing. If the house wrap is behind the flashing, water will run directly onto the wood. If the house wrap is over the flashing, it directs water safely onto the flashing and away from the house.
FAQ
Q: Can I use silicone caulk to seal the junction?
A: It is generally discouraged. Silicone does not adhere well to many types of house wraps, and it cannot be painted. Polyurethane sealants provide a stronger, more durable bond that is better suited for the expansion and contraction of vinyl.
Q: Should I caulk the bottom of the J-channel to the roof?
📷 Photo by storage.googleapis.com
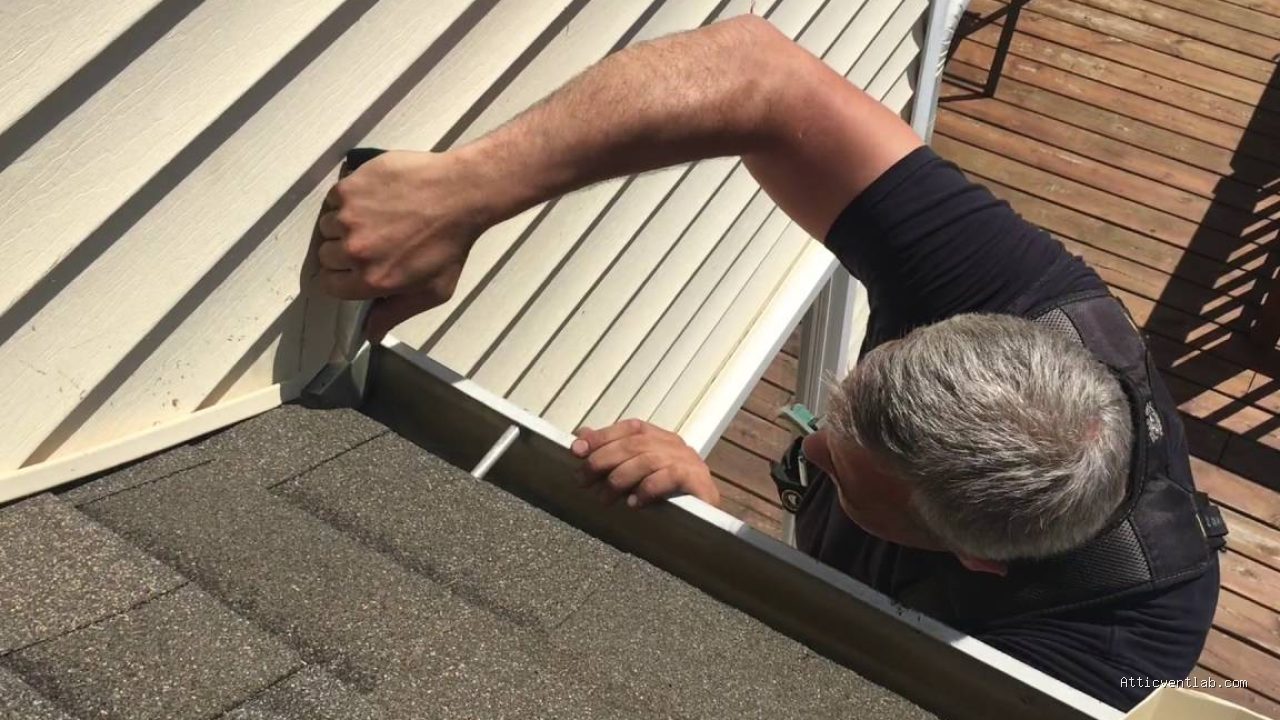
A: No. Caulking the bottom edge creates a dam that traps moisture. The J-channel should be installed so that it sheds water onto the flashing, which then directs it onto the shingles.
Q: How often should I inspect this seal?
A: You should inspect the roof-to-wall transition at least once a year, preferably in the spring after the winter freeze-thaw cycles have subsided, to ensure the sealant has not cracked or separated.
By following these steps and avoiding the common trap of over-caulking the drainage points, you can ensure that your siding installation remains secure and your home stays dry for years to come. Remember, the goal is not just to block water, but to provide a clear, unobstructed path for it to exit the system.
📷 Photo by abihomeservices.com








Leave a Reply